Categories
Grilling Tips

How to Grill Corn in the Husk

Do you know how to grill corn in the husk? You might be surprised to learn that it’s not half as difficult as it sounds.

When you grill corn cobs in their husks it gives the kernels a delicious, smoked flavor that is impossible to resist.

How to Grill Corn in the Husk: Soaking the Cobs

Soaking corn cobs in water prior to putting them on the grill is a crucial step in your preparation. What this does is How to Grill Corn in the Huskit makes the husks more pliable, and it allows the corn to absorb the water that is necessary for the cooking process.
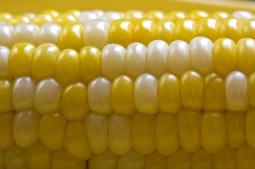
Some people who know how to grill corn on the cob in the husk insist that you should use cold water for soaking but the temperature of the water does not seem to be an important detail. You may even choose to boil the corn in water as opposed to letting it soak. This is perfectly acceptable as well.

Soaking time can be as short as 30 minutes to as long as 2 hours. Fortunately, you don’t really need to worry about over soaking because corn won’t become mushy or inedible if left in water for a long period of time.

How to Grill Corn in the Husk: Buttering the Cobs

When grilling corn in the husk it is a good idea to butter the corn both before and after cooking. After the corn has finished soaking, use a knife or a brush to apply butter to the kernels. If you don’t want to use butter consider substituting olive oil.

You can also follow up the butter with some seasonings and spices if you want. Salt works well, but don’t be afraid to get creative and try other things like dried dill and powdered garlic.

How to Grill Corn in the Husk: Cooking the Cobs

More than likely you will be grilling more than just corn. Assuming that to be the case, make sure to position the cobs along the edges of the grill grate. The corn needs to cook slowly under low to medium heat.

You should strategize to keep your corn on the grill as long as possible. The longer it cooks over the fire, the more the smoke flavor will seep through the husks and permeate the corn. Some people try to keep their corn on the grill for as much as 30 minutes. Theoretically, you can cook the cobs until the husks burn off.  Either way, grilled corn with husks are delicious!

Knowing how to grill corn on the cob in the husk is a simple way to bolster your grilling repertoire.

Go back to BBQ Tips Main Page
Go to iGrillBBQ.com Home Page from how to grill corn in the husk

Categories
Grills by Brand

New Holland Grills

Those who have found standard gas grills rather frustrating to operate have discovered that new holland brand grills hold the solution to their barbeque problems.

Holland’s unique drip-pan configuration eliminates flare-ups from dripping juices, guaranteeing consistency and evenness in the delicious meals that come off your grill. Read on to see how this grill can transform your grilling experience.

New Holland Grills: Information

Backyard BBQ enthusiasts have often experienced annoyance and even a ruined meal by having their carefully prepared meats burned by flare-ups due to dripping grease. The Holland System, developed about twenty years ago, takes care of this problem by placing a drip pan between the grill rack and the flame.

Instead of causing destructive flare-ups, the juices from grilling meats sizzle on the drip pan and create smoke that makes your barbecue even better.

Holland advertises that you can simply close the lid and cook by time, eliminating the need to constantly check the grill and adjust the placement of meat.

New Holland Grills: Models

New holland brand grills are available in a variety of models, from the “Companion”, a small portable grill ideal for camping or tailgating, to the “Patriot,” which incorporates the patented Holland System in a charcoal grill. Other available models feature a stainless steel body, storage cabinets, and a separate infrared searing grill. Although Holland does not sell directly to consumers, their grills can be found at many local retailers. 

New Holland Grills: Are They Right For You?

Grilling in the backyard, at a company picnic, or for a social event should be enjoyable. If you are spending an entire picnic standing over a flaming grill trying to keep your meat cooking evenly, you are missing out on the joys of grilling! Holland advertises that you can simply close the grill’s lid and cook by time, leaving you more time for enjoying your event.

If you are looking for a grill that makes barbequing a fun, simple, easy, and greatly rewarding experience, you should definitely visit your local retailer to take a look at a new Holland grill.

Go back to Grill Brands Main Page
Go to iGrillBBQ.com Home Page from New Holland Grill

Categories
Grilling Tips

How to Cook Pork Chops on the Grill

Have you ever grilled a pork chop and have dry out by overcooking it on the grill? How to cook delicious pork chops on the grill can be foolproof if you follow these tips.

How to Cook Pork Chops on the Grill: Tips on Buying the Right Cut

Before you do anything else you have to make sure you buy the right cut of meat. The best thickness for pork chops is between 1″ and 1-1/2 “. If the chop is less than one inch and you run the risk of overcooking, burning or drying out the meat. If your pork chops are more than 1-1/2 inches you run the risk of ending up with slightly raw meat. Whether you grill your pork chops without the bone or with the bone in is a matter of personal choice, but it appears that the majority of grilling experts prefer the bone in.

How to Cook Pork Chops on the Grill: Tips on Preparing Your Pork Chops for Grilling

A recurring problem when cooking pork chops on the grill is the meat losing moisture and drying out from cooking. One way to combat this problem is a process called “brining”. Mix up some brine, also known as salt water, with one cup salt for each gallon of water. Soak the pork chops in the solution overnight before cooking.

This will ensure that the pork chops will come out moist and soft every time. Pork chops are so tasty on their own that good old pepper and salt will more than suffice for many people. Of course you can experiment with various marinades and rubs.

How to Cook Pork Chops on the Grill: Tips on Cooking Your Pork Chops on the Grill

First thing is to get that grill as hot as it will go. Then place the chops on the grill and sear them with the lid down. This usually takes one minute per side. Visually it means the meat browns and fat will crisp up. Finish them off 4 minutes per side on a low to medium heat with the lid down.

Your pork chops should be cooked and ready to eat except for one more important step than many people over look when grilling chops. You must allow them to rest for a while, at least ten minutes. By allowing your pork chops to rest, it allows them to begin cooling off. When the chop begin to cool the moisture gets drawn back into the center of the meat making the chops thick and juicy, just the way you want them.  Hope you’ve learned how to cook delicious pork chops on the grill!

Go back to BBQ Tips Main Page
Go to iGrillBBQ.com Home Page from How to Cook Pork Chops on the Grill

Categories
Grill Types

Walmart Gas Grills

Are you looking for a way to make this summer great? Walmart gas grills are known for being inexpensive, but do they really have the best prices?

Walmart has a great reputation of providing quality products at low cost, and their grills are no exception. Given their prices, it’s easier than ever to get started becoming a bbq master.

Walmart Gas Grills: Features

walmart gas grills

Walmart offers a wide variety of outdoor gas grills, from small tabletop models to large double-rack grills with side burners and storage cabinets. Many of these are available in your local store, but their official website allows them to make additional models available through online ordering.

Most of the time, these online orders can be shipped to your local store for you to pick up with no shipping charges. At Walmart, many gas grills available include many of the top brands: Brinkmann, Coleman, and Weber just to name a few. Of course, at Walmart you can also buy all of the other equipment you need to start grilling, such as brushes, tongs, propane gas grills, and an apron to make you look like a real pro.


Walmart Gas Grills: Pros and Cons

Purchasing a gas grill from Walmart carries numerous advantages, including an easy return policy, low pricing, and a wide selection. In addition, their website features a large number of customer reviews for each grill model. Detailed search capabilities allow you to narrow down the selections by price, brand, and customer ratings.

As far as disadvantages, you may not be able to buy the kind of extended warranty that many home improvement stores offer.  Also, if you order a grill online, you probably won’t be able to look closely at it and try out its features until you actually place your order and it arrives at your local store.

Walmart Gas Grills: Are They For You?

If you are looking for an inexpensive, simple way to supply your backyard with a gas barbeque grill and all the necessary accessories to get started, Walmart is a great place to look. Their website clearly shows which models are in stock at your local store, and you can check prices without even leaving your home. When you combine Walmart’s extensive online services with their local convenience, Walmart grills are more available than ever!

Go back to Types of Grills Main Page

Go to I Grill BBQ.com Home Page from walmart gas grills

Categories
BBQ Review

Traeger Grills Reviews

Are you looking for a grill that combines versatility with ease of use? If these are your priorities, Traeger grills reviews found on the internet can help you decide on your next bbq grill purchase.

Customers who have tried out the Traeger system describe the simplicity of its operation. The electric-based ignition and easy temperature control make this a grill that even the least experienced barbecuer can operate successfully. Enjoy my Traeger grill review.

Traeger Grills Reviews: Pros and Cons

Pros:
Reviewers seem united in giving top marks to the flavor of the food that comes out of their Traeger grills. Reviews consistently praise the great taste and even cooking of meat, vegetables, and even desserts like cobblers.

Ease of use is the other main benefit of this particular grilling system; other than refilling the grill with wood pellets (its heat source) occasionally, the only work required is to plug the ignitor into a normal electrical socket and set the temperature control knob. The general consensus seems to be that it is difficult to get anything but great-tasting food out of this grill!

Check out Traeger Grills on Amazon.com!

Cons:
Apparently, although these grills were constructed by a U.S.-based company at first, cost and demand have forced construction to be outsourced to other countries. Some customers report that these foreign-made versions are put together with less care and that numerous of the parts have to be replaced more frequently than expected.

Another disadvantage is the relatively high price of a Traeger grill. Reviewers agree that the extra cost is equal to the superb taste quality it produces, but for some customers the price may simply be prohibitive.

Traeger Grills Reviews: Analysis

If your priorities include the ability to grill a wide variety of foods with success, this grill deserves your close attention. When the lid is closed, heat surrounds the grill rack, cooking food thoroughly and evenly. Starting and maintaining the temperature couldn’t be simpler, requiring roughly the same work as using a kitchen oven.

Because the starting mechanism is electrically based, a storage space protected from weather would be ideal for long-term functioning. If your budget allows and you can obtain a warranty to protect against possible malfunctions, the conclusion among reviewers is that you will not regret investing in this revolutionary product.

Traeger Grills Reviews: Where To Buy

Traeger Grills can be purchased online!

  • Go here=> Amazon.com (You’ll go straight to the Traeger Amazon page)

Go back to Grill Reviews Main Page
Go to I Grill BBQ.com Home Page from Traeger grills reviews

Categories
Grilling Tips

How to Grill Chicken Wings

Summer is here and you need to learn about grilling chicken wings for your upcoming barbecue. Are you confident you can get grilled chicken wings right the first time?

Better not leave anything to chance. Learn fast with these quick and easy tips for grilled chicken wings the right way.

How to Grill Chicken Wings: Preparation Tips

You can purchase whole chicken wings or wings already cut. Most people who have experience with grilled chicken wings prefer the variety that has already been cut. Cutting them yourself can be time consuming, even though the whole ones tend to be cheaper. If you decide you do want to cut them yourself you should hold the wing at the base and cut between the bones with a sharp knife.

With regard to seasonings and marinades, try branching out a little bit beyond the traditional BBQ sauces. You can use all kinds of products for a marinade like honey, brown sugar, and even lemon juice.

How to Grill Chicken Wings: Cooking Tips

One of the biggest difficulties with grilling chicken wings is dealing with flare ups and scorching. Flare ups are caused by melted fat from the meat dripping onto the coals of your fire. You can help to avoid this by removing as much excess fat and skin from the wings as possible prior to placing them on the grill.

If the grill starts flaring up while the meat is cooking, you can grab the wings with tongs and try to shake the fat off into the fire or onto the ground. You could even remove the wings from the grill entirely until the flare up dissipates. Bottom line: do whatever it takes to keep flare ups from scorching your wings and ruining the presentation of your meal.

Plan to rotate the wings every 3 to 5 minutes. When you think they are done cut one open and make sure that none of the meat inside is pink. Remember, poultry needs to be cooked all the way through before consumption.

How to Grill Chicken Wings: Serving Tips

Just before serving, douse the wings with several generous swaths of barbecue sauce. You can even leave them on the grill for a couple of minutes afterward so that the meat has a chance to absorb some of the sauce. If you do choose to leave them on the grill just be sure and close all the vents to tone down the heat.

Following these simple suggestions for grilling chicken wings will enhance your skills and help take your grilling experience to the next level.

Go back to BBQ Tips Main Page
Go to iGrillBBQ.com Home Page from How to Grill Chicken Wings

Categories
Grilling Tips

How to Grill a Salmon Fillet

Are you looking for the wow factor for your next neighborhood cookout? Knowing how to grill salmon is the key.

Grilled salmon is a great addition to any barbecue event, and these easy to follow tips separate the chefs from the cooks.

How to Grill a Salmon Fillet: The Selection

The most important thing is to pick the right salmon fillet, and the best cut of fillet comes from the head end of the salmon; tail-end fillets tend to be too thin and don’t work well on the grill. Though thick cuts are best (about 1 inch), don’t feel like you have to slice off the thinner end of the tapered fillet; some guests may prefer their salmon more done than others, and the thinner end fits the bill as it will cook through more quickly.

You can pick fillets with either the skin on or the skin off, depending on the recipe you use. Once you are confident that you know how to grill salmon fillet, you can experiment with different types of salmon and different cuts.

How to Grill a Salmon Fillet: The Preparation

Once you’ve decided whether you are going to leave the skins on or remove them, make sure all the bones are out; no one likes to get a bone in an otherwise tasty bite and then have to fish it out of his mouth. Rinse the fillets and pat them dry.

Apply any lemon juice, seasonings, and/or rubs to the fillets and let them sit for about 15-20 minutes before placing them on the grill; it is best to grill meat at room temperature to keep them from cooking too quickly on the outside.

How to Grill a Salmon Fillet: The Grilling

You want the grill to be hot, hot, hot—about 500 degrees—before placing the salmon fillets on the grill. You also want to the grill to be clean, so take time to scrub away the remains of your last cookout and then apply a thin layer of oil, such as a cooking spray or oil rubbed on using tongs and a cloth.

You may even want to try your hand at using different flavored wood chips for a nice smoky taste. If you are using fillets that still have their skins on, start out cooking them skin side up for about 5 minutes over direct heat; then carefully flip the fillets using a spatula that is large enough to accommodate the entire fillet and cook another 5 minutes.

When the fish is pink and flaky, use the spatula to separate the fillet from the skin. Serve it up with your favorite side and you will prove to everyone that you know how to grill salmon.

Go back to BBQ Tips Main Page
Go to iGrillBBQ.com Home Page from How to Grill a Salmon Fillet

Categories
Grilling Tips

How to Grill Chicken Legs

Everyone loves a tasty drumstick at a cookout, and it’s not hard to learn the way to grill chicken legs.

Wings and legs are the all-time favorite game-time snack food, so fire up the grill and follow these simple tips for great drumsticks to beat the band.

How to Grill Chicken Legs: Cheer Time

Let’s hear it for barbecued chicken legs . . . or marinated chicken legs . . . or lightly seasoned chicken legs. You decide. There are hundreds of recipes to choose from, from sauces to rubs to marinades to nothing but good old grill. To get complete coverage of the legs, try using a one-gallon plastic zipper bag when applying marinades, sauces, or rubs.

Depending on your preference, you can either remove the skins or leave them on; if you don’t plan on eating the skins after they are cooked, you may want to consider removing them before you apply any flavorings. No since throwing away all that great-tasting flavor. Either way, let your drumsticks sit in the seasonings for at least one hour.

How to Grill Chicken Legs: Half-Time

Clean and preheat the grill. Then place the drumsticks on the hottest part of the grill and sear all sides; after searing, move the legs to a cooler part of the grill. If you are using a gas grill, simply turn the heat down; if you are using a charcoal grill, you may need to heap the coals to one side to give you a cooler area for barbecuing.

Again, if you are using a gas grill, feel free to put the lid down; if you are using a charcoal grill, you need to decide how much char flavor you want on the drumsticks. If you want a less smoky flavor, keep the lid up. If you are using a rub or seasoning that is not oil-based, you may want to lightly spray the grill rack to keep the legs from sticking.

How to Grill Chicken Legs: Game Time

Once the drumsticks are on the grill, you need to watch them carefully; plan on checking them at least once every 5 minutes. Rotate the legs when a side has turned a nice brown, crispy color. Chicken legs take 20-30 minutes to cook, depending on the level of heat you are using; a meat thermometer in the meatiest part of the drumstick should have a reading of at least 165 degrees.

Now that you have demonstrated your chicken leg grilling skill, call the guys in for the game and eat up.

Go back to BBQ Tips Main Page
Go to iGrillBBQ.com Home Page from how to grill chicken legs

Categories
Grilling Tips

How to Grill Salmon on a Gas Grill

The gas grill is not just for cooking hamburgers and hot dogs for the big game; step up your game by learning how to cook salmon on the grill.

Everyone loves to cook on a gas grill, and the more options you have for cooking outside means beating the heat of the kitchen inside.How to Grill Salmon on a Gas Grill

How to Grill Salmon on a Gas Grill: Pick It Up

When shopping for salmon, be sure to select thick, head-end fillets; about a 1-inch thickness is perfect for the gas grill. Depending on the recipe you are using, you may want to buy fillets with the skin still on.

After you have cleaned the fish in cold water and patted dry, add the flavor combinations you like best: lemon juice and garlic, seafood rubs, or even mayonnaise and season salts. Let your prepared fillets sit for about 15-20 minutes to reach room temperature before placing them on the grill.

Salmon Grillin’ Set Up

The key to a successful grilling experience, especially when it comes to fish, is a clean grill. Using a wire brush, scrub off the remains of your last barbecue extravaganza and oil the rack; a light cooking spray applied over the grill will keep the salmon from sticking to the grill. Another trick is to use heavy-duty aluminum foil on the grill, either as a packet or like a cookie sheet; this is especially helpful if you are using skinless salmon fillets.

You should still coat the foil with oil, unless you are using a recipe that calls for coating the fillets in mayonnaise. Preheat the grill and turn the burners to a low setting.

BBQ’n that Salmon: Cookin’ It Up

It’s time to put the salmon on the grill. If you are using fillets with the skin still on, place the meat with the skins facing up. Close the lid of the grill, and let the fish cook for about 5 minutes; only open the lid when you are ready to flip the fish.

Then close the lid and cook for another 4-5 minutes. You know the salmon is ready when it is pink and flaky. If the skin is still intact, use a spatula to separate the fish from the skin. Then serve it up hot off the grill. Your family and friends will be amazed that you know how to cook salmon on the grill with all the expertise of a gourmet chef.

Go back to BBQ Tips Main Page
Go to iGrillBBQ.com Home Page from How to Grill Salmon on the Grill

Categories
Grilling Tips

How to Grill Chicken on the Stove

If you know how to grill chicken on the stove, you can bring that outdoor goodness right into your kitchen. All you need is the right equipment and the right techniques.

Here are some tips to help with grilling chicken on the stove.

How to Grill Chicken on the Stove: Start with a Cast Iron Grill Pan

Athena 6300 Max Burton Stove Top Smoker pack of 4
Click here and check out this stove smoker!

Indoor grilling is a convenient and healthy way to cook while bringing out the fun and flavors of outdoor grilling. A grill pan, sometimes called a riffle pan, can convert any stove top into a grill. Get a good heavy cast iron grill pan that is already seasoned so it will not stick. These pans are cheap, easy to clean, easy to maintain, last a lifetime and it can be put right into the oven.

How to Grill Chicken on the Stove:Start with Good Ingredients

Do not compromise on the quality of the chicken. Get the best you can afford. Organically raised chickens are the best in both taste and healthy eating, but they are expensive. So called “all natural” is still quite good and a little cheaper. You should try, at the very least, to get free-range quality chicken.

Check this out! Makes a great gift!=> Athena 6300 Max Burton Stove Top Smoker pack of 4
If you have to settle for grocery store off the shelf chicken, search out the brand that injects the least amount water and other chemicals into the bird. You many also want to invest in a instant-read meat thermometer. With chicken, you have very little room between under cooked, with unpleasant thoughts of salmonella, and overcooked, with the meat having the dry, hard texture of footwear.
The thermometer helps you find that narrow range of tasty juiciness that eludes so many cooks while giving piece of mind that the chicken is cooked thoroughly. Your indoor grilled chicken will be be guaranteed done at 165°F.

How to Grill Chicken on the Stove: Grilling it Right

For perfectly grilled chicken every time use the following tips. Turn up the burner to high with the grill pan on top of your stove. You can heat it up until you have to turn on the exhaust fan because the pan is smoking a bit. Coat the chicken in olive oil and coat it with your favorite seasoning.

Once in lifetime opportunity! => Athena 6300 Max Burton Stove Top Smoker pack of 4

Put the chicken in the hot pan for one and half minutes per side so it is seared with distinct grill marks. Then turn the heat down to medium (375°F) and continue cooking. Usually it will be about five minutes per side, but be careful not to over cook. This is when the thermometer comes in handy and you can start checking for done chicken.
After the chicken is finished, take it out of the  grill pan and let it set a while before serving. Cooling a little lets the juices flow back to the center of the meat, insuring it is soft and moist. You can serve it up and show everyone you know how to grill chicken on the stove.

Go back to BBQ Tips Main Page
Go to iGrill BBQ.com Home Page from how to grill chicken on the stove