Categories
Grill Types

Rotisserie Grills

Just the mention of roasted chicken makes your mouth water, but have you ever considered the versatility of a rotisserie grill for yourself?

From turkeys to roasts to chicken, a rotisserie grill makes any meal a gourmet event; you do not have to go to a fancy restaurant to enjoy a juicy, tender bite.

Rotisserie Grills: Features

Whether you go with an independent rotisserie grill system or a rotisserie kit that attaches to your present grill, there are some key features to look for. The most important feature to look at is the actual spit, the rod that passes through the meat and rests on the brackets of the turning system; most spits are 20-40 inches, but some systems come with spit extenders. You also want to make sure that the skewers or forks are durable and will not bend under the weight of the meat.

Drip trays to collect the juices and roasting baskets to cook veggies or smaller portions of meat are other convenient features to be considered. When looking at the rotisserie motor, a twin direction motor is best; this motor reverses direction throughout the cooking process to provide even more balanced heating. A fun alternative to the traditional grill rotisserie  is the version that goes over a campfire; you don’t have to confine your camp-out fare to just hamburgers and hot-dogs, though those can be cooked on a rotisserie as well.

Rotisserie Grills: Pros and Cons

Everyone knows that roasting your meat is much tastier and more nutritious than frying. By turning on a spit, the meat maintains its juices, moving them over and through the meat instead of dripping them out; however, more fat is eliminated in the roasting process. And with roasting baskets, you can also cook up some delicious veggies to go with your meat. Now roasting is not a quick process, but the end result is well worth the wait; because you are cooking large pieces of meat, the whole animal in some cases, it will take longer to cook.

Rotisserie Grills: Is It For You?

If you are looking for a more healthy but tasty way to eat meat, then a rotisserie system for your grill is a great alternative. And there are so many trusted name-brands to choose from: Weber, Char-Broil, and of course George Foreman. Roasted chicken, roasted lamb, roasted beef—they are not just for the oven anymore, and they are not just for the market or restaurant. A rotisserie grill gives you the opportunity to turn out juicy, fall off the fork meat dishes worthy of the gourmet chef.

Go back to Types of Grills Main Page
Go to iGrillBBQ.com Home Page from Rotisserie Grills
Categories
Grill Types

Sandwich Makers

Have you ever wondered what makes a soup and sandwich shop so popular, especially at lunchtime? Maybe it’s the sandwich maker they are using.

Nothing beats a grilled sandwich with melting cheese and a bowl of hot soup; there’s just something about using sandwich makers that fits the menu and fills the stomach.

Sandwich Makers: Features

The key to a great sandwich is the melted cheese and of course the grill marks, and a good sandwich maker helps you achieve that goal. With nonstick sides and a flexible hinge, you can turn out perfect sandwiches every time; the flexible hinge is especially important if you want to use thicker slices of bread.

Some grills come with interchangeable plates for different textures and grill lines or even different food items. Be sure to look for a heat-resistant exterior with a built-in thermostat; depending on your preference, you can get a cordless model or one with a built-in plug system. A built-in timer and dinger to let you know when your sandwich is done will free you up to get the soup on and brew some iced tea. And almost all sand wich makers come with a host of recipes to try; you will definitely be thinking outside the box.

Sandwich Makers: Pros and Cons

The great thing about these portable grills (electric sandwich makers) is the versatility; they make so much more than sandwiches. You can cook up ham and cheese omelets, loaded French toast, and even meat dishes. Of course, you are limited to making two at a time, but the combinations are limitless. This small appliance fits anywhere in your kitchen, and it is easy to clean. And for the cost of one trip to the local soup and sandwich shop, you can have your own sandwich maker to try out your own concoctions; who knows you may get your own show on the Food Network.

Sandwich Makers: Is It For You?

If you like a cooked to perfection grilled cheese sandwich with a hot bowl of soup, then you definitely need to invest in a sandwich maker grill. And with a host of top names to choose from, including Cuisineart, Chefmate, George Foreman, Black & Decker, and more, you are sure to find what you are looking for. And don’t forget the creativity; with a sandwich maker on the counter, you can dish up a sandwich bonanza fit for a gourmet chef.

Go back to Types of Grills Main Page
Go to iGrillBBQ.com Home Page from Sandwich makers 

Categories
Grill Types

Stovetop Grills

Are you looking for great grill flavor without the grief of a grill? Then you should consider the versatility of stovetop grills.

Breakfast, lunch, or dinner— a stovetop grill gives you the flexibility of creativity to prepare any meal for any occasion for any sized group.

Stovetop Grills: Features

Most stovetop grills come with nonstick surfaces that function as a grill on one side and a griddle on the other. They fit over one or more burners on almost any stove top, be it electric or gas; they even work on flat-top stoves. They come in a variety of shapes but primarily rectangular and circular. Some even come with stovetop grill pans that you can fill with water to add moisture to your meal as well as to catch the drippings from those tasty morsels you are cooking up; this in turn helps prevent smoke and splatter and makes for easier cleanup. Other features to look for when purchasing a grill for your stovetop include heat-resistant handles for safety in handling and grill presses to squeeze out excess fat or flatten meat or sandwiches.

Stovetop Grills: Pros and Cons

The great thing about a stovetop grill, even cast iron stove top grills, is that it is compact and affordable; you can pick up some models for just under $10 or go as high as $100, depending on the features you are looking for, with the average price being around $25. And you do not have to worry about the weather; you can have great grill food during a blizzard. The griddle side allows you to turn out great pancakes, French toast, or tortillas as well as roast delicious, nutritious vegetables. Now, you may have to contend with grease splatter and smoke, and there is the fact that the grill can take up half of your stovetop; however, the biggest drawback to a stovetop grill is the time it takes to heat the entire grill evenly. Maintaining even heat can be difficult because of the dead space between the burners, but preheating the grill for 10-15 minutes before cooking will go a long way in solving that problem.

Stovetop Grills: Is It For You?

If you live alone or in an apartment type setting or if you are just looking for a more healthy way to cook, then you should definitely consider getting a grill that fits on top of your stove. The smaller size means easier storage, and you don’t have to heat up an entire grill to cook up smaller portions. Also, if you live in an area that is prone to bad weather or cold weather, then being able to grill inside is a big advantage; no more cookout cancellations. A stovetop grill is really for everyone and adds a new dimension to your cooking.

Go back to Types of Grills Main Page
Go to iGrillBBQ.com Home Page from Stovetop Grills

Categories
Grilling Tips

How to Grill a Salmon Fillet

Are you looking for the wow factor for your next neighborhood cookout? Knowing how to grill salmon is the key.

Grilled salmon is a great addition to any barbecue event, and these easy to follow tips separate the chefs from the cooks.

How to Grill a Salmon Fillet: The Selection

The most important thing is to pick the right salmon fillet, and the best cut of fillet comes from the head end of the salmon; tail-end fillets tend to be too thin and don’t work well on the grill. Though thick cuts are best (about 1 inch), don’t feel like you have to slice off the thinner end of the tapered fillet; some guests may prefer their salmon more done than others, and the thinner end fits the bill as it will cook through more quickly.

You can pick fillets with either the skin on or the skin off, depending on the recipe you use. Once you are confident that you know how to grill salmon fillet, you can experiment with different types of salmon and different cuts.

How to Grill a Salmon Fillet: The Preparation

Once you’ve decided whether you are going to leave the skins on or remove them, make sure all the bones are out; no one likes to get a bone in an otherwise tasty bite and then have to fish it out of his mouth. Rinse the fillets and pat them dry.

Apply any lemon juice, seasonings, and/or rubs to the fillets and let them sit for about 15-20 minutes before placing them on the grill; it is best to grill meat at room temperature to keep them from cooking too quickly on the outside.

How to Grill a Salmon Fillet: The Grilling

You want the grill to be hot, hot, hot—about 500 degrees—before placing the salmon fillets on the grill. You also want to the grill to be clean, so take time to scrub away the remains of your last cookout and then apply a thin layer of oil, such as a cooking spray or oil rubbed on using tongs and a cloth.

You may even want to try your hand at using different flavored wood chips for a nice smoky taste. If you are using fillets that still have their skins on, start out cooking them skin side up for about 5 minutes over direct heat; then carefully flip the fillets using a spatula that is large enough to accommodate the entire fillet and cook another 5 minutes.

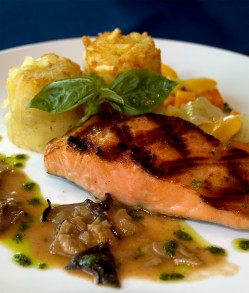
When the fish is pink and flaky, use the spatula to separate the fillet from the skin. Serve it up with your favorite side and you will prove to everyone that you know how to grill salmon.

Go back to BBQ Tips Main Page
Go to iGrillBBQ.com Home Page from How to Grill a Salmon Fillet

Categories
Grilling Tips

How to Grill Chicken Legs

Everyone loves a tasty drumstick at a cookout, and it’s not hard to learn the way to grill chicken legs.

Wings and legs are the all-time favorite game-time snack food, so fire up the grill and follow these simple tips for great drumsticks to beat the band.

How to Grill Chicken Legs: Cheer Time

Let’s hear it for barbecued chicken legs . . . or marinated chicken legs . . . or lightly seasoned chicken legs. You decide. There are hundreds of recipes to choose from, from sauces to rubs to marinades to nothing but good old grill. To get complete coverage of the legs, try using a one-gallon plastic zipper bag when applying marinades, sauces, or rubs.

Depending on your preference, you can either remove the skins or leave them on; if you don’t plan on eating the skins after they are cooked, you may want to consider removing them before you apply any flavorings. No since throwing away all that great-tasting flavor. Either way, let your drumsticks sit in the seasonings for at least one hour.

How to Grill Chicken Legs: Half-Time

Clean and preheat the grill. Then place the drumsticks on the hottest part of the grill and sear all sides; after searing, move the legs to a cooler part of the grill. If you are using a gas grill, simply turn the heat down; if you are using a charcoal grill, you may need to heap the coals to one side to give you a cooler area for barbecuing.

Again, if you are using a gas grill, feel free to put the lid down; if you are using a charcoal grill, you need to decide how much char flavor you want on the drumsticks. If you want a less smoky flavor, keep the lid up. If you are using a rub or seasoning that is not oil-based, you may want to lightly spray the grill rack to keep the legs from sticking.

How to Grill Chicken Legs: Game Time

Once the drumsticks are on the grill, you need to watch them carefully; plan on checking them at least once every 5 minutes. Rotate the legs when a side has turned a nice brown, crispy color. Chicken legs take 20-30 minutes to cook, depending on the level of heat you are using; a meat thermometer in the meatiest part of the drumstick should have a reading of at least 165 degrees.

Now that you have demonstrated your chicken leg grilling skill, call the guys in for the game and eat up.

Go back to BBQ Tips Main Page
Go to iGrillBBQ.com Home Page from how to grill chicken legs

Categories
Grilling Tips

How to Grill Salmon on a Gas Grill

The gas grill is not just for cooking hamburgers and hot dogs for the big game; step up your game by learning how to cook salmon on the grill.

Everyone loves to cook on a gas grill, and the more options you have for cooking outside means beating the heat of the kitchen inside.How to Grill Salmon on a Gas Grill

How to Grill Salmon on a Gas Grill: Pick It Up

When shopping for salmon, be sure to select thick, head-end fillets; about a 1-inch thickness is perfect for the gas grill. Depending on the recipe you are using, you may want to buy fillets with the skin still on.

After you have cleaned the fish in cold water and patted dry, add the flavor combinations you like best: lemon juice and garlic, seafood rubs, or even mayonnaise and season salts. Let your prepared fillets sit for about 15-20 minutes to reach room temperature before placing them on the grill.

Salmon Grillin’ Set Up

The key to a successful grilling experience, especially when it comes to fish, is a clean grill. Using a wire brush, scrub off the remains of your last barbecue extravaganza and oil the rack; a light cooking spray applied over the grill will keep the salmon from sticking to the grill. Another trick is to use heavy-duty aluminum foil on the grill, either as a packet or like a cookie sheet; this is especially helpful if you are using skinless salmon fillets.

You should still coat the foil with oil, unless you are using a recipe that calls for coating the fillets in mayonnaise. Preheat the grill and turn the burners to a low setting.

BBQ’n that Salmon: Cookin’ It Up

It’s time to put the salmon on the grill. If you are using fillets with the skin still on, place the meat with the skins facing up. Close the lid of the grill, and let the fish cook for about 5 minutes; only open the lid when you are ready to flip the fish.

Then close the lid and cook for another 4-5 minutes. You know the salmon is ready when it is pink and flaky. If the skin is still intact, use a spatula to separate the fish from the skin. Then serve it up hot off the grill. Your family and friends will be amazed that you know how to cook salmon on the grill with all the expertise of a gourmet chef.

Go back to BBQ Tips Main Page
Go to iGrillBBQ.com Home Page from How to Grill Salmon on the Grill

Categories
Grilling Tips

How to BBQ Pork Ribs

Learning how to grill pork ribs? Have you ever served up finger-licking barbecue pork ribs? You know, the kind that falls of the bone and drips with flavor.

Who says ribs are hard to grill? You just have to know how to grill pork ribs, and you will have a taste sensation the neighbors will be talking about.

How to BBQ Pork Ribs: Prep Work

As with any grilling experience, the prep work for ribs is just as important as the grill work. First, buy fresh ribs that have not already been doctored up with rubs or seasonings.

Next, rinse the ribs and cut off any excess fat; leave some on though for extra flavor and juiciness. If you are planning to grill the ribs straight up without a rub, sear them in a pan of oil for about 10 minutes with the meat side down.

However, if you want to use  a rub on the ribs, you should put the rub mixture on about 2 hours before you plan to grill and do not sear.

How to BBQ Pork Ribs: Grill Work

With the prep work done, it’s time to get those ribs on the grill. Preheat the grill to a medium temperature, about 250 degrees. It is best to cook the meat over indirect heat to keep it from burning or drying out. If possible, use chunks of wood rather than chips to allow a slow smolder rather than a quick burn.

You can choose the type of wood based on your flavor preference; apple or cherry offers a milder taste over hickory or mesquite. You will want to place the ribs with the bone side down, basting them every 20 minutes for up to 2 hours with an acidic basting juice like lemon to keep the meat moist and tender. Slow is the key. And when they are done, you will have plenty of time to savor the flavor.

How to BBQ Pork Ribs: Finish Work

When the ribs are almost done is the time to add the sauce. If the sauce is applied too early, the sugars in the sauce can cause the meat to burn. You may want to consider holding off on the sauce and adding it later when the ribs are off the grill; you may find that the grilling and basting have provided all the flavor needed for great barbeque ribs.

And you know they’re done when the meat is ready to fall off the bone. Once you have mastered the art of BBQ pork ribs, you will never want to eat them any other way.

Go back to BBQ Tips Main Page
Go to iGrillBBQ.com Home Page from how to BBQ pork ribs

Categories
Grilling Tips

How to BBQ Corn on the Cob

Learning how to bbq corn on the cob? There’s nothing like grilled corn on the cob to bring back memories of the fair or a Fourth of July Picnic. Learn how to grill corn on the cob.

The key to a good corn roast is the wrap and the rub. Below are some easy tips to show you how to add America’s favorite veggie to the menu.

How to BBQ Corn on the Cob in Foil

The easiest and tastiest way to grill corn on the cob is in foil; you can seal so much flavor and moisture in while keeping the flames out. Simply remove the husks and silk from the cobs and rinse.

Pat dry and rub in butter or oil. Place the cob in the center of a piece of foil and season with your favorite seasonings.

Be sure to wrap the cob tightly so that the melting butter and juices do not escape. You can either wrap several cobs together or wrap them individually, but wrapping them individually makes for easier serving at the picnic table.

The foil methods works great for most veggies, so try grilling up your whole garden.

Barbecuing Corn on the Cob in Husks

Some people prefer to barbecue their corn directly on the grill, and the best way to keep the corn from burning or drying out too fast is to keep the husks on. Simply remove the dry outer husks and the silk since these will burn quickly and turn to ash; do keep as much of the husks intact as possible.

Then soak the corn in water for 10-20 minutes; this will add moisture to the corn and keep the husks from burning quicker than the corn inside can cook. After the corn has soaked, pull the husks down a bit and coat them with butter or oil and seasonings.

A good way to ensure those flavors stay in the corn and don’t drip out into the grill is to tie off the top of the husks with a thin piece of husk.

Barbecuing Corn on the Cob on the Grill

Whether barbecuing in the husks or in a foil packet, corn on the cob takes about 15-20 minutes to cook. Cooking over medium heat or on an elevated shelf will allow for more even cooking without burning. Especially with the husk method, you want to turn the cobs every few minutes.

By moving the cobs to a higher cooking rack, you can grill your other food items at the same time. Everything comes off the grill at the same time, and you can sit down to a tasty meal complete with veggies.

Go back to BBQ Tips Main Page
Go to iGrillBBQ.com Home Page from How to BBQ corn on the cob

Categories
Grilling Tips

How to BBQ Chicken Breast

Not many people have the skill to grill chicken right, but knowing how to grill a chicken breast will make you a hit at the next neighborhood cookout.

Chicken is a great menu item, but it can be difficult to handle on the grill. Following a few simple tips will make your next barbecue a success. Learn how to make a great grilled chicken breast.

How to BBQ Chicken Breast: Prep time

Because of the shape of chicken breasts, it is easy to overcook some parts of the chicken while leaving other parts underdone. An easy solution is to cut the meat to a more even shape and then pound the chicken to a thickness of about 1/2 inch. Another option is to cut the chicken into strips; just make sure they are large enough so that they do not fall through the grill. A good way to keep the chicken moist is to use a brine or marinade, soaking for about 30 minutes before grilling; an oil-based marinade works best. Do not apply sugar-based sauces, such as BBQ sauce, before grilling because they can cause the chicken to burn; apply these sauces only after the meat is done.

How to BBQ Chicken Breast: Cook time

Before placing the chicken on the grill, you may want to coat the clean grill with oil or cooking spray; this will keep the meat from sticking to the grill. The key to cooking chicken is to use direct heat for a short period of time. You need to turn the meat over only once, and there is no need to sear the chicken; searing the meat will allow the juices to escape and dry out the meat. Boneless chicken will cook in less time than chicken with the bone in.

How to BBQ Chicken Breast: Brine Time

Brine is simply a saltwater solution that chefs use to add more flavor and tenderness to their meat. A basic brine solution is 1 cup of table salt to 1 gallon water; you can adjust the measurements based on the amount of meat you have to prepare, but you want enough brine solution to completely cover the meat. The time for soaking varies depending on the amount of meat and the level of salt flavor you want.

Using these simple tips and the recipes for chicken at iGrillBBQ.com, you will having a winning menu that keeps them asking for more.

Go back to BBQ Tips Main Page
Go to iGrillBBQ.com Home Page from How to BBQ chicken breast

Categories
Grilling Tips

How to Barbecue Steak

Do you want to know how to grill steak? Are you looking to impress your friends and family with a mouthwatering barbecue steak recipe?

Learning how to grill a steak takes more than just throwing a piece of meat on the grill.

With the right tools and techniques, your steaks will be the talk of the neighborhood. And it’s not complicated; in fact, knowing how to grill a steak is quick and easy.

How to Barbecue Steak: Buying the Meat

The first decision to make before going to the grill is what cut of meat are you going to use; this is mainly a matter of preference. What can you afford? What flavor do like? How much fat do you like in your steak?

The filet is the most tender of the steak choices, though with less steak flavor; it is also the more costly. Ribeye steaks have more fat marbled throughout and provide a juicy, flavorful steak when cooked properly. Going down the cost spectrum, you have strips, T-bones and Porterhouse, and finally sirloin.

No matter what cut of steak you get, make sure it is a good thickness, about an inch.

How to Barbecue Steak: Prepping the Meat

The best steak is a fresh steak, so try not to freeze your steaks; instead, try to purchase them on the day you are going to use them. If you have to freeze them, try to thaw them in the refrigerator or cold water. When it is time to throw those steaks on the grill, they should be at room temperature.

After patting the steaks dry, feel free to cover them in a rub or marinade (remember marinades should be applied about 30 minutes before grilling). You can find great recipes for rubs and marinades at igrillbbq.com.

How to Barbecue Steak: Cooking the Meat

Gas grills are best for cooking steaks, but charcoal grills are great too for giving that meat a nice charred flavor; either way, make sure your grill is hot. A gas grill should preheat for about 20 minutes, and charcoal should be covered in gray ash. If using a charcoal grill, you may want to consider an alternate heating source for lighting the goals to avoid the taste of starter fluid.

The key to barbecuing good steak is to use the shortest amount of time possible without burning the steak. Once your steak is at room temperature and you have applied any rub or marinade, place your steaks on the hot grill and close the lid. Don’t let your steaks catch on fire but watch for the sides to turn gray; then turn the steaks over and close the lid again.

Once all the sides are gray and there are the tell-tale grill marks on both sides, you can check for doneness. After you have achieved the doneness you like, let the steak sit about 5 minutes and then enjoy. Congratulations! You’ve learned how to grill steak!

Go back to BBQ Tips Main Page
Go to iGrillBBQ.com Home Page from how to barbecue steak