Categories
Bar-B-Q Recipes Grilling Tips

S’mores

What’s better after an outdoor meal in the backyard than rich, gooey s’mores? Nothing, that’s what! But there’s no need to build a campfire and sharpen sticks in order to enjoy some marshmallow and chocolatey goodness. Now you can make them right on the grill. Whether you’re having hamburgers and hot dogs or grilled salmon, s’mores will bring a smile to everybody’s face when dessert time rolls around.

Easy S’mores on the Grill

Traditional s’mores require just three ingredients: graham crackers, marshmallows, and chocolate. We like the big jumbo marshmallows, because they’ll cover the entire cracker and squish out the sides–yum! Use your favorite chocolate (milk or dark); break into cracker-sized bars.

Heat the grill to medium (or just leave it on after you finish grilling dinner) and set it up for indirect heat. Break graham crackers in half, forming squares. Top half of the squares with marshmallows and the other half with chocolate. Place crackers on the cooler side of the grill. Grill for 2-3 minutes, or until the marshmallow and chocolate have melted. Sandwich and serve!

Fancy S’moressmores

You can tweak the basic s’more idea to create some truly delicious concoctions. Assemble your favorite meltable candy and use in place of the chocolate. Try these ideas to tantalize your tastebuds:

  • Peanut butter chips
  • M&Ms
  • Peppermint patties
  • Heath bars
  • White chocolate
  • Peppermint bark
  • Caramel squares
  • Strawberries or bananas
  • Reese’s Peanut butter cups
  • Raspberry-filled chocolate squares
  • Coconut
  • Lemon pie filling

Try these ideas on their own or along with a square of chocolate!

S’more Buffet

Try creating a s’more buffet for a fun and easy dessert that your guests will be talking about for weeks! Assemble the above ingredients and place in individual dishes. You can also add different graham cracker varieties (regular, chocolate, cinnamon), and different marshmallow flavors or colors.

Ask each guest to assemble his or her own s’mores and bring to the grill master for grilling! This is a fantastic idea for block parties, birthday parties, or other large gatherings.

You can also try savory s’mores for a twist on these classic favorites. Use herb or whole wheat crackers, a variety of cheeses, and deli meat, bacon, or pepperoni. Use them as appetizers or as a tasty side dish when serving a less filling entree.

No one can say no to a gooey, hot s’more filled with chocolatey favorites. To guarantee a popular grand finale to your outdoor dinner, add s’mores to the menu!

Go back to BBQ Recipes from S’mores
Go back to iGrillBBQ Home from S’mores

Categories
Bar-B-Q Recipes Grilling Tips

Pizza

Pizza on the grill? You bet! If you love the taste of wood-fired pizza, you’ll be amazed at how closely you can approximate that taste on the grill in your own backyard. Once you’ve tried it, grilled pizza will become one of your favorite go-to backyard barbecue recipes.

Why Grill Your Pizza?pizza

When it’s so easy to bake in the oven, why would you choose to grill your pizza instead? First, because you don’t have to heat up your oven, and in the summer time, you want to avoid as much heat in the house as possible! Grilling pizza gives you an alternative to traditional barbecue menu options while still allowing your to keep the heat outside, not inside.

But the best reason to grill pizza is that it’s so distinctively delicious. There is nothing like that smoky, slightly charred crust when you bite into a homemade grilled pizza. I guarantee you’re going to love it.

What’s Different About Making Pizza on the Grill?

The primary difference is that you start grilling the crust before you add the toppings. This way, you ensure that the crust gets done all the way through and you don’t end up with sticky dough in the middle. Of course, this means you’ll need to have everything prepared ahead of time and be ready to quickly top the pizza halfway through grilling. Once you’ve grilled one side of the dough, you’ll flip the pizza, remove it from the heat, brush the grilled side with olive oil, and add your toppings. Then, return the pizza to the grill to finish cooking.

Grilled Pizza Recipe

Ready to give it a try? Here’s a step-by-step recipe you can use tonight!

  • Make or buy your pizza dough. You can buy fresh dough from many grocery stores or pizzerias.
  • Spread dough into desired shape. An oblong pizza may fit your grill better than a traditional round shape.
  • Oil grill plates to prevent sticking and heat to medium high for direct heat grilling.
  • Transfer pizza dough to hot grill using a rimless cookie sheet or pizza peel.
  • Grill the dough for 5-6 minutes, watching carefully to see when it begins to brown. When you see nice brown grill marks, remove the pizza from the grill using your cookie sheet and spatula.
  • Now for the fun part! Flip the pizza over so that the grilled side is up. Brush with oil and top with sauce and all your favorite toppings. Be careful not to spread the toppings too thickly or the pizza may not grill all the way through.
  • Return the pizza to the grill and close the lid. Grill for 5-6 more minutes, or until the crust has turned golden brown and the cheese has melted.
  • Serve and enjoy!

That’s it! While it may take a time or two to figure out the best heat and cooking time based on your grill, you will be so glad you stuck with it once you have perfected your grilling technique.

Go back to BBQ Recipes from Pizza
Go back to iGrillBBQ Home from Pizza


Categories
Bar-B-Q Recipes Grill Beef Grilling Tips Uncategorized

How to Grill Brisket

The brisket is a very large, flavorful, and versatile cut of beef. Its large size combined with a unique blend of fat, collagen, and long muscle fibers make brisket an ideal cut for many dishes.

How to Grill Brisket: Texas Style

The most common method of grilling brisket involves a subtle seasoning profile, if any seasonings are used at all. This method produces what most think of as “Texas style” BBQ brisket. This type of brisket is cooked to the point where the fat and collagen break down completely, leaving nothing but tender meat fiber that pulls apart easily. These meat fibers are either pulled apart by hand or chopped, producing either pulled or chopped brisket barbecue.

How to Grill Brisket: General Considerations

Texas style brisket is a relatively simple affair. The basic recipe and procedure follow. Keep in mind that the recipe here ought to serve only as a guideline. Everyone has different tastes and preferences. A large piece of meat like brisket is very forgiving and will likely turn out very tasty no matter how you may botch up the recipe. So rest easy knowing that though you may venture far and wide with your seasoning blend, you are almost guaranteed a delicious result. The only way you could mess up a smoked brisket is by not cooking it at all. With that in mind, experiment away. How to grill brisket

How to Grill Brisket: Procedure

1) Assemble a basic BBQ meat rub for your brisket. About half of this rub ought to be kosher salt, with another quarter of the rub being brown sugar. From there, typically you would use around 10% to 15% chili powder, or other generally spicy seasoning. The rest can be a mix of aromatic seasonings, the most dominant being onion and garlic powder.

2) Apply your rub generously to the entire exterior of your brisket. Massage the rub into the meat with a firm hand; you want to get as much flavor into the meat as possible.

3) Tightly wrap the brisket in plastic wrap and refrigerate overnight, or for up to 3 days. In general, the longer your brisket has to absorb the seasoning flavors, the better. This is known as a dry brine.

4) 8 to 12 hours before you plan to eat your brisket, light a fire in the smoker and stabilize the temperature around 200-225 degrees Fahrenheit. Lay in a few chunks of hickory or mesquite wood for smoke flavor and wait until they begin producing strong smoke before you lay on the brisket.

5) Smoke the brisket at 200 – 225 degrees Fahrenheit for 8 – 12 hours, until the internal temperature reaches at least 195 degrees.

6) Remove the brisket from the grill and pull it apart for sandwiches or other serving styles. Brush on sauce as desired and enjoy!

Go back to BBQ Recipes from How to Grill Brisket
Go to iGrillBBQ.com Home Page from How to Grill Brisket
Categories
Grilling Tips

Grilling Techniques

Everyone knows there is more to grilling than just tossing a piece of meat over the flame. Proper grilling techiques must be employed to ensure that your food comes out perfect every time.

Grilling Techniques overview

Grill masters use many different techniques in their pursuit of culinary perfection. Some techniques are simple and ought to be observed every time you use the grill. Some techniques are more advanced and take some practice to get the hang of. Remember that achieving perfection takes time. Keep working at perfecting these skills, remember that every grill is different so you can be sure that there will be some tweaking to do. Take a look at the more detailed posts about each technique to learn more.Grilling Techniques

Basic Grilling techniques

Perhaps one of the most basic grilling techniques to master is direct heat and indirect heat grilling. Simply put, direct heat means that your food is directly above and exposed to the flame of the grill. Indirect heat means that the food is not being exposed to the open flames. Both grilling methods have their advantages and disadvantages. On a gas grill, place your food above an active burner for direct heat. For indirect heat, turn off the burner directly below your food but leave the others on. For indirect grilling on a charcoal grill, pile all of the burning charcoal to one side of the grill and place your meat on the opposite side of the grate.
Direct heat grilling is typically used with the next technique of discussion: searing. Searing meat creates the appetizing grill marks and irregular coloring that we think of with grilled food. Because of the direct exposure to the flame, the surface of the meat changes on a molecular level, enhancing the flavor.
Indirect heat grilling is typically used with more delicate meats, such as seafood; or with longer cooking meats, such as pork shoulder. Another use for indirect heat is with smoking food. Smoke chips impart a massive amount of flavor to any food. Indirect heat is ideal with smoking because it allows the smoke to work into the meat without searing the outside so more smoke cannot get in.

Advanced grilling techniques

Braising is not something reserved for the indoor oven, it can also be accomplished on the grill. Typically braising refers to cooking meat in liquid in the oven. When used in the grill, it is important to monitor your temperature during the braise. Indirect heat should be used to keep the bottom of the meat from burning due to direct exposure to the flame.
Baking is also a technique that can be used on the grill. Most often we think of baking pizza on the grill, but you can also make a number of rustic loaves and even pan breads with the grill. When baking on the grill, once again, the heat ought to be monitored closely. Many factors are at play when baking, check out the baking post for a detailed discussion of these grilling techniques.

Go back to Grilling Tips Main Page
Go to iGrillBBQ.com Home Page from Grilling Techniques

Categories
Grilling Tips

Grilling Salmon Fillets

Grilling salmon fillets? They are a tasty dish that’s certain to please everyone at your summer barbecue, and you might be surprised how quick it is! So, want to start?

Why Salmon?

Why opt for salmon more than other grilled fish? Though most fish are healthy, salmon is among the healthiest, due mostly to its high contents of nutrients, such as omega-3 fatty acids.

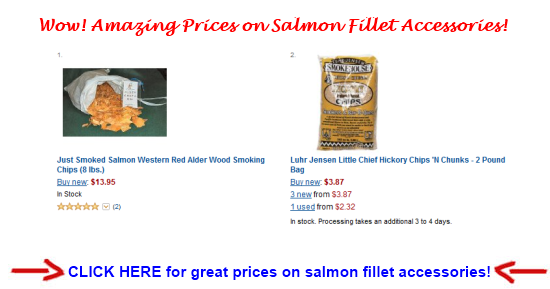
Not only that, but you can get out-of-this-world salmon smoking chips!

salmon fillet accessories

Grilling Salmon Fillets: Cooking Process

How do you really go about grilling salmon fillets? As mentioned before, the method is genuinely very simple. The fact is, deciding which kind of salmon filet you want is likely the most difficult part! Copper River salmon, Coho salmon, Atlantic salmon, and Tasmanian

grilling salmon fillets

salmon all taste a bit different so realizing what flavor you want is crucial.

Check out these great grilling salmon fillets accessories!


Grilling Salmon Fillets: Grillin’ ‘Em

As soon as you have chosen your fillets, rinse them in water. Remove the skin and take out the bones. Then, season the salmon. Lemon juice is actually a popular addition to the fillets, but you are able to also add your favorite grill seasonings: barbecue sauce, garlic, etc., and, of course, salt and pepper!

The fillets will need to sit for about twenty minutes soon after being seasoned. When grilling salmon fillets, ensure the grill temperature is set to 500 degrees. An average one-inch thick filet will need to be grilled for a total of eight to ten minutes (4 or 5 on each side) to be cooked medium-well.

The time will differ by a minute or two every way for bigger or smaller fillets, and of course if you would like yours more or less done, you are going to need to adjust accordingly. The salmon fillets are best if cooked over wood chips or some sort of hardwood.

Grilling Salmon Fillets: Side Dishes

Maybe you are wondering what to serve as a side dish along with your grilled salmon fillets? It certainly is true to say that your standard barbecue sides, i.e. potato salad, may well not be appropriate at a fish dinner. But there are many choices for you. First, any green vegetable goes well with fish. Grilled asparagus is a popular side. You may also want to consider having a gourmet salad.

Grilling salmon fillets is often a terrific technique to give your summer cookout a one of a kind, healthy touch. It’s sure to be a hit with all your guests; even people who do not like fish generally like salmon.
Go back to Grilling Tips Main Page
Go to iGrillBBQ.com Home Page from Grilling Salmon Fillets

Categories
Grilling Tips

How to Grill Ribs on a Gas Grill

Lots of people might know the best way to grill ribs on a gas grill, but few can actually pull it off. Want to give it a try?

If you need some direction for doing ribs on a gas grill, look no further. This handful of tips will help guide you down the road of success.

How to Grill Ribs on a Gas Grill: Using Smoke Bombs

One of the biggest challenges facing those who would learn to grill ribs on a gas grill is the difficulty of turning out ribs that have a genuine smoked flavor. Therefore, some gas grill owners opt to use smoke bombs in the bottom of their grills to try and create a smoke concentration during the cooking process.

To make a smoke bomb for your grill take a handful of damp (not wet) wood chips and wrap them up in an aluminum foil ball. Then poke a couple of holes in the thinnest layer of foil to allow the smoke to escape. You may use as many bombs as you wish, but you should probably use at least two.

Preheat the grill and place the smoke bombs as close to the burner as possible. When the bombs start smoking, dial down the heat and prepare begin cooking your ribs.

How to Grill Ribs on a Gas Grill: Using Indirect Heat

Grilling ribs over indirect heat is not usually a good idea, particularly with a gas grill. You need to find a way to position the meat as far away from the burners as possible. If you are also cooking other food on the grill as well this may require some spatial negotiation.

Another factor to take into consideration is the location of the burners on your grill. Their positioning underneath the grate will determine how you need to arrange the ribs so as to avoid direct heat.

How to Grill Ribs on a Gas Grill: Using Apple Juice

When the ribs are about three quarters of the way done it is a good idea to steam them with apple juice. Do this by first placing a layer or layers of aluminum foil underneath the meat. Then, trickle the juice over the ribs and wrap the foil around them to create as much of an air-tight seal as possible.

Along with the smoke flavor, this extra step will make a big difference in the final product.

Learning to grill ribs on a gas grill can be tough, but congratulations for being willing to give it a try.

Go back to BBQ Tips Main Page
Go to iGrillBBQ.com Home Page from How to Grill Ribs on a Grill

Categories
Grilling Tips

How to Grill Corn on the Cob without Husks

Have you ever wondered how to grill corn on the cob without the husk? The fact is that sometimes, for whatever reason, the husks are just not available.

Fortunately, corn cobs can be cooked on the grill quite effectively even if you don’t have any husks in which to wrap them.

How to Grill Corn on the Cob without Husks: Wrapping the Cob

Since you don’t have husks to wrap the cobs, the next best thing to use is aluminum foil. Break each cob in half then cut rectangular how to grill corn on the cob without huskspieces of foil in which to wrap them.

Those who have learned how to grill corn on the cob without the husk find it helpful to insert a skewer into each half cob before cooking. This should give you a sufficient handle for holding and transporting the cobs to and from the grill.

Grilling Corn without Husks: Seasoning the Cob

Butter and salt are by far the most common ingredients used to season corn on the cob. You should apply these to the corn before wrapping up the cob in aluminum foil. After adding the butter and seasonings, the cobs should be ready for the grill.

Some people who are familiar with how to grill corn on the cob without the husks prefer to get creative with their seasonings. Instead of butter and salt they use things like olive oil, black pepper, chopped onion, minced onion, or garlic powder. Go ahead and get creative with new combination of seasonings.

How to Grill Corn on the Cob without Husks: Cooking the Cob

If your grill has a top rack that is the best place to put the corn. Even if your grill doesn’t have a top grate, you can still locate the cobs to the extremities of the grill so as to prevent them from either cooking too fast or over cooking.

Cooking cobs of corn on the grill needs to be done very slowly. Plan to turn the cobs regularly, probably every 3-5 minutes, so that they don’t end up scorched on any particular side.

You can test the corn before removing it from the grill to see if it has finished cooking. Unwrap one of the cobs, being careful not to burn yourself, and poke the kernels with your finger. If they are soft to the touch then the corn is done.

With the help of these simple suggestions, figuring out how to grill corn on the cob without the husk can be a cinch.

Go back to BBQ Tips Main Page
Go to iGrillBBQ.com Home Page from How to Grill Corn on the Cob without Husks

Categories
Grilling Tips

How to Grill Corn on the Cob in Foil

If you aren’t sure how to grill corn on the cob with foil, take a few seconds and check out these helpful hints. You probably don’t realize how easy it is.

By paying attention to these couple of tips, you can make your guests mouth water at the sight, smell, and taste of grilled corn on the cob.

How to Grill Corn on the Cob in Foil: Wrapping the Cobs

How to Grill Corn on the Cob in Foil  Before putting the cobs in aluminum foil it is always necessary to soak or boil them in water ahead of time. Otherwise, you will end up with dried and hardened kernels that will turn your stomach rather than make your mouth water.

Most people who know anything about how to grill corn on the cob with foil prefer to apply butter and seasonings both before and after grilling. Once the corn is buttered and seasoned, it should be wrapped completely in aluminum foil. If the entire cob is not thoroughly enclosed in the foil then it will not steam on the grill as intended.

How to Grill Corn on the Cob in Foil: Placement on the Grill

You need to be particular about where on the grill you choose to place your cobs. If your grill has a top rack, you definitely want to put them up there. If not, just do your best to keep them off to the sides of the grate away from the more intense heat in the middle.

Rotate the cobs frequently so they don’t get too well done on one side. Also, try to be aware of which parts of the grill are hottest and move the cobs around so that they cook evenly.

How to Grill Corn on the Cob in Foil: Seasonings for Taste

Once the corn comes off the grill give it a fresh coat of butter and shower it with a seasoning ingredient of your choice. Nothing beats a fresh cob of corn hot off the grill dripping with butter.

Butter and salt are the traditional ingredients used to season corn on the cob. However, you should not feel constrained to use them exclusively. Go out on a limb and try some new spices for a change. For instance, consider sprinkling garlic salt or oregano over the freshly buttered kernels. Also keep in mind that olive oil offers a healthy substitute for butter.

Now that you have some pointers about how to grill corn on the cob with foil, there is no excuse for not giving it a try.

Go back to BBQ Tips Main Page
Go to iGrillBBQ.com Home Page from How to Grill Corn on the Cob with Foil

Categories
Grilling Tips

How to Grill Chicken Thighs

Figuring out the best way to grill chicken thighs does not have to be an exercise in futility. Try these handy tips for doing chicken thighs on the grill.

Some people seem to think that the breast is the only part of a chicken that can be cooked effectively with a grill. Fortunately, this is not the case.

How to Grill Chicken Thighs: Preparing the Meat

In the preparation stage, make sure to remove as much of the excess fat as possible. Fat will melt and drip onto the coals causing flare ups. Flare ups will scorch the exterior of your meat and make it looked burned.

You also want to wash the meat thoroughly, especially if you plan to season the pieces before placing them on the grill. Seasoning your chicken before grilling is a great way to maximize the flavor. Keep in mind that more important than the type of seasoning you use is how you apply it. As much as possible, you should try to get the seasoning directly onto the meat because the skin acts like a barrier and prevents the flavor from infiltrating the meat.

How to Grill Chicken Thighs: Cooking the Meat

Use a wire brush to clean the grate before placing your meat on the grill. Then, apply a small amount of vegetable oil to the grate to prevent the meat from sticking.

If you ask any pro about grilling chicken thighs he will tell you to cook them slowly under medium to low heat. Position the meat toward the extremity of the grill grate. Keep a close watch for flare ups. If the flames flare up from melted fat dripping into the fire you can either remove the chicken from the grill till the fire dies down, or you can grab the meat with tongs and shake the liquid fat off into the fire or onto the ground.

Check the meat periodically and turn over when the bottom becomes firm and brown. Rearrange the pieces on the grill as necessary if one area is cooking faster than another.

How to Grill Chicken Thighs: Finishing the Meat

Shortly before the chicken thighs are finished, close the vents on your grill and douse the meat with several layers of barbecue sauce. Let the chicken sit on the grill for just a couple of minutes afterward to give the sauce time to seep into the meat. If you want, you can turn the chicken and repeat this step prior to removing it from the grill. These grilled chicken thighs will be yummy!

Dispel any doubt that grilling chicken thighs is easy by following these couple of helpful suggestions.

Go back to BBQ Tips Main Page
Go to iGrillBBQ.com Home Page from How to Grill a Chicken Thigh

Categories
Grilling Tips

How to Grill Corn in the Husk

Do you know how to grill corn in the husk? You might be surprised to learn that it’s not half as difficult as it sounds.

When you grill corn cobs in their husks it gives the kernels a delicious, smoked flavor that is impossible to resist.

How to Grill Corn in the Husk: Soaking the Cobs

Soaking corn cobs in water prior to putting them on the grill is a crucial step in your preparation. What this does is How to Grill Corn in the Huskit makes the husks more pliable, and it allows the corn to absorb the water that is necessary for the cooking process.

Some people who know how to grill corn on the cob in the husk insist that you should use cold water for soaking but the temperature of the water does not seem to be an important detail. You may even choose to boil the corn in water as opposed to letting it soak. This is perfectly acceptable as well.

Soaking time can be as short as 30 minutes to as long as 2 hours. Fortunately, you don’t really need to worry about over soaking because corn won’t become mushy or inedible if left in water for a long period of time.

How to Grill Corn in the Husk: Buttering the Cobs

When grilling corn in the husk it is a good idea to butter the corn both before and after cooking. After the corn has finished soaking, use a knife or a brush to apply butter to the kernels. If you don’t want to use butter consider substituting olive oil.

You can also follow up the butter with some seasonings and spices if you want. Salt works well, but don’t be afraid to get creative and try other things like dried dill and powdered garlic.

How to Grill Corn in the Husk: Cooking the Cobs

More than likely you will be grilling more than just corn. Assuming that to be the case, make sure to position the cobs along the edges of the grill grate. The corn needs to cook slowly under low to medium heat.

You should strategize to keep your corn on the grill as long as possible. The longer it cooks over the fire, the more the smoke flavor will seep through the husks and permeate the corn. Some people try to keep their corn on the grill for as much as 30 minutes. Theoretically, you can cook the cobs until the husks burn off.  Either way, grilled corn with husks are delicious!

Knowing how to grill corn on the cob in the husk is a simple way to bolster your grilling repertoire.

Go back to BBQ Tips Main Page
Go to iGrillBBQ.com Home Page from how to grill corn in the husk