Categories
Grilling Tips

Grilling Techniques

Everyone knows there is more to grilling than just tossing a piece of meat over the flame. Proper grilling techiques must be employed to ensure that your food comes out perfect every time.

Grilling Techniques overview

Grill masters use many different techniques in their pursuit of culinary perfection. Some techniques are simple and ought to be observed every time you use the grill. Some techniques are more advanced and take some practice to get the hang of. Remember that achieving perfection takes time. Keep working at perfecting these skills, remember that every grill is different so you can be sure that there will be some tweaking to do. Take a look at the more detailed posts about each technique to learn more.Grilling Techniques
Basic Grilling techniques

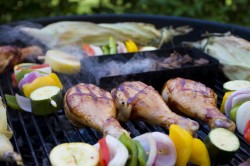
Perhaps one of the most basic grilling techniques to master is direct heat and indirect heat grilling. Simply put, direct heat means that your food is directly above and exposed to the flame of the grill. Indirect heat means that the food is not being exposed to the open flames. Both grilling methods have their advantages and disadvantages. On a gas grill, place your food above an active burner for direct heat. For indirect heat, turn off the burner directly below your food but leave the others on. For indirect grilling on a charcoal grill, pile all of the burning charcoal to one side of the grill and place your meat on the opposite side of the grate.
Direct heat grilling is typically used with the next technique of discussion: searing. Searing meat creates the appetizing grill marks and irregular coloring that we think of with grilled food. Because of the direct exposure to the flame, the surface of the meat changes on a molecular level, enhancing the flavor.
Indirect heat grilling is typically used with more delicate meats, such as seafood; or with longer cooking meats, such as pork shoulder. Another use for indirect heat is with smoking food. Smoke chips impart a massive amount of flavor to any food. Indirect heat is ideal with smoking because it allows the smoke to work into the meat without searing the outside so more smoke cannot get in.

Advanced grilling techniques

Braising is not something reserved for the indoor oven, it can also be accomplished on the grill. Typically braising refers to cooking meat in liquid in the oven. When used in the grill, it is important to monitor your temperature during the braise. Indirect heat should be used to keep the bottom of the meat from burning due to direct exposure to the flame.
Baking is also a technique that can be used on the grill. Most often we think of baking pizza on the grill, but you can also make a number of rustic loaves and even pan breads with the grill. When baking on the grill, once again, the heat ought to be monitored closely. Many factors are at play when baking, check out the baking post for a detailed discussion of these grilling techniques.

Go back to Grilling Tips Main Page
Go to iGrillBBQ.com Home Page from Grilling Techniques
Categories
Grill Beef

South American Grilled Meat Dish

Looking for authentic South American style grilled meat dishes? Check out the following recipe that will give a Latin flare to your next rack of ribs.

It sounds too good to be true, but this recipe is super quick and easy to make. With only a handful of ingredients and minimal prep and cook time, what’s to lose?

South American Grilled Meat Dish Information

Preparation time: 5 minutes

Cook time: 15 minutes

Makes: 6

Servings: 6

South American Grilled Meat Dish Ingredients

South American Grilled Meat Dish
1 Cup of coarse salt, sea salt, or iodized salt (more or less salt may be used)

6 Pounds of beef short ribs

6 Quartered limes

1 Bottle of BBQ sauce (if desired)

South American Grilled Meat Dish Directions

1. Ignite your grill and bring it to medium or medium-high heat. If you are using a charcoal grill be sure to give the coals plenty of time to die down before proceeding with the cooking process.

2. Clean and lightly oil the cooking grate.

3. Apply a generous amount of salt to the ribs (this will help to bring out the fat in the meat).

4. Place ribs on the grill. Regardless of the type of grill you are using, you need to be sure and cook with indirect heat. Keep the ribs away from the center of a charcoal grill or away from the burners of a gas grill.

5. Allow the ribs to cook for about 5 to 7 minutes before rotating for another 5 to 7 minutes (you may choose to cook them for longer if you prefer them more well done).

6. Remove the ribs and squeeze the lime juice over them until completely covered.

7. Serve immediately

Most people balk at the amount of salt that this recipe calls for. However, users testify that the amount of salt prescribed is not excessive. At any rate, you do not need to use the entire cup if you deem it unnecessary.

It is worth noting is that this dish will be greatly enhanced by a freshly tossed salad and/or freshly picked garden vegetables. Grilled potatoes or corn on the cob would also be another side worth considering.

For those with taste buds honed on more American style cuisine, feel free to lather barbeque sauce on the ribs shortly before pulling them off the grill. Diners from a Latin American background, however, might need to include a few additional spices to liven up the experience.

Go back to Beef on the Grill Main Page
Go back to BBQ Recipes Main Page
Go to iGrillBBQ.com Home Page from South American Grilled Meat Dish

Categories
Grilling Tips

How to BBQ Tri Tip

Want to know How to grill Tri-Tip?  When grilled right, tri-tip is a beautiful, succulent juicy piece of meat.

Tri tip is a triangle shaped piece of meat from the bottom of the sirloin. We will show you simply how to grill this cut of meat resulting in a delicious, succulent roast every time.

How to BBQ Tri Tip: Keep it Simple

Tri tip is marbled superbly with fat. When grilled properly, trip tip is a juicy, delicious piece of meat. However, most grillers do not know how to grill tri tip without ruining it. They do things like trimming every bit of fat off of it,  stuffing it with garlic, overdoing it with some random spice combination and constantly tinkering with it on the grill. The secret is to do less to this piece of meat, not more. Do less and your guest will think you are a great cook. But before putting the meat on the grill, you have to make sure you have a great piece of meat.

How to BBQ Tri Tip: Picking Out and Preparing Your Tri Tip

Tri tip comes in trimmed and untrimmed versions. Untrimmed comes with a layer of fat on one side. As you would expect, the untrimmed is cheaper. Get the untrimmed and you can do any trimming you want to do at home. Look for nice even marbling. The rule of thumb is that no marbling should be wider than your finger. Without trimming, you will have a lot of fat and many flare ups on the grill. Go ahead and trim off the layer of fat, but not all of it.

  • You should leave about 15%-20% of the fat layer on the tri tip.
  • Use a bit of meat tenderizer. Don’t overdo it; too much tenderizer can turn your meat into mush.
  • Coat it with your favorite dry rub for beef. Out favorite is Grizzly Joe’s “Trail Dust”. Don’t overdo the rub. You still want to taste tri tip, not just seasoning. It is not necessary to oil tri tip before adding the rub; the meat already fatty enough. The natural juices will pull the flavor from the spices into the meat.
  • It is important that the meat is room temperature when you grill it. Let it set for 2-4 hours before grilling.

How to BBQ Tri-TipHow to BBQ Tri Tip: Grilling Your Tri Tip

Get part of the grill good and hot, about 400 degrees, and have a section that is closer to medium. Put the meat with fat side up over the medium part of the grill but close enough to hotter part that it gets indirect heat. Do not let it drip and flare up, you want a nice indirect heat. Do not stab or poke the meat. This is very important because poking and stabbing lets the juices run out. Do not touch the meat, just let it cook.

The meat is flipped once and only once. After about 15 minutes on the first side flip the roast. Let it cook about 5 minutes on the second side and then start checking it by pressing on the center of the roast. If it feels mushy it is still raw in the middle. Keep checking it and as soon as it is firm take it off grill. It should be medium-rare.

Meat will continue to cook for about ten minutes when taken off the grill. When you let the meat rest, the roast will contract and it draws the juices back to center of the roast, making it more juicy and tasty. Cut it against the grain into ½-inch thick steaks and enjoy.

Go back to BBQ Tips Main Page
Go to I Grill BBQ.com Home Page from How to BBQ Tri Tip