Categories
Bar-B-Q Recipes Grilling Tips

S’mores

What’s better after an outdoor meal in the backyard than rich, gooey s’mores? Nothing, that’s what! But there’s no need to build a campfire and sharpen sticks in order to enjoy some marshmallow and chocolatey goodness. Now you can make them right on the grill. Whether you’re having hamburgers and hot dogs or grilled salmon, s’mores will bring a smile to everybody’s face when dessert time rolls around.

Easy S’mores on the Grill

Traditional s’mores require just three ingredients: graham crackers, marshmallows, and chocolate. We like the big jumbo marshmallows, because they’ll cover the entire cracker and squish out the sides–yum! Use your favorite chocolate (milk or dark); break into cracker-sized bars.

Heat the grill to medium (or just leave it on after you finish grilling dinner) and set it up for indirect heat. Break graham crackers in half, forming squares. Top half of the squares with marshmallows and the other half with chocolate. Place crackers on the cooler side of the grill. Grill for 2-3 minutes, or until the marshmallow and chocolate have melted. Sandwich and serve!

Fancy S’moressmores

You can tweak the basic s’more idea to create some truly delicious concoctions. Assemble your favorite meltable candy and use in place of the chocolate. Try these ideas to tantalize your tastebuds:

  • Peanut butter chips
  • M&Ms
  • Peppermint patties
  • Heath bars
  • White chocolate
  • Peppermint bark
  • Caramel squares
  • Strawberries or bananas
  • Reese’s Peanut butter cups
  • Raspberry-filled chocolate squares
  • Coconut
  • Lemon pie filling

Try these ideas on their own or along with a square of chocolate!

S’more Buffet

Try creating a s’more buffet for a fun and easy dessert that your guests will be talking about for weeks! Assemble the above ingredients and place in individual dishes. You can also add different graham cracker varieties (regular, chocolate, cinnamon), and different marshmallow flavors or colors.

Ask each guest to assemble his or her own s’mores and bring to the grill master for grilling! This is a fantastic idea for block parties, birthday parties, or other large gatherings.

You can also try savory s’mores for a twist on these classic favorites. Use herb or whole wheat crackers, a variety of cheeses, and deli meat, bacon, or pepperoni. Use them as appetizers or as a tasty side dish when serving a less filling entree.

No one can say no to a gooey, hot s’more filled with chocolatey favorites. To guarantee a popular grand finale to your outdoor dinner, add s’mores to the menu!

Go back to BBQ Recipes from S’mores
Go back to iGrillBBQ Home from S’mores

Categories
Bar-B-Q Recipes Grill Sauces

Grilled Vegetable Marinade

Grilled vegetables make a delicious accompaniment to your favorite meat or chicken, but they can be downright magical when you take the time to marinate them before grilling. If you’ve never considered marinating your vegetables, you’re going to be thrilled with the delicious flavors you can create with just a little effort.

Preparing a Grilled Vegetable Marinadegrilled vegetable marinade

Like marinades intended for meat, your vegetable marinade will consist of an oil, an acid, and whatever flavorings and herbs you want to add. The acid (citrus juice or vinegar) serves to break down the vegetable fibers, allowing the flavor to be absorbed.

It’s easy to create your own marinade by deciding what flavor family you want and choosing herbs and spices that fit in that category. For instance, an Italian meal might use an herb-garlic vegetable marinade, while a Cajun theme might opt for something a little spicier.

Grilled Vegetable Marinade Ideas

Not everyone feels confident enough in their chef skills to throw together a marinade off the top of their head. For those of us who would rather work from a recipe, here are five delicious vegetable marinades to tantalize your tastebuds:

  1. Garlic Soy–1/2 c. olive oil, 1/2 c. lemon juice, 1/2 c. soy sauce, and 1 clove fresh minced garlic. Whisk together in a bowl and pour over vegetables in a zip top bag.
  2. Mojo–3/4 c. olive oil, 1 c. sour orange juice (or substitute 1/2 c. orange juice, 1/4 c. lemon juice, and 1/4 c. lime juice), 3 cloves garlic, 1/2 c. minced onion, 1 tsp. oregano, 1/2 tsp. crushed peppercorns, and 1 tsp. salt.
  3. Asian–2 Tbsp. soy sauce, 2 Tbsp. rice wine vinegar, 2 tsp fresh ginger, 1 tsp sesame oil.
  4. Garlic Lemon Basil–1/4 c.  olive oil, 1/4 c. lemon juice, 1/4 c. chopped fresh basil, 2 cloves minced garlic.
  5. Basalmic Honey–1/4 c. Balsamic vinegar, 2 Tbsp. olive oil, 1 c. soy sauce, 1 Tbsp. honey, 2 Tbsp. fresh thyme, 1 tsp black pepper.

Don’t be afraid to experiment! Change up the ingredients, add your own, or try something completely different. It’s all part of the outdoor chef experience!

Grilling Tips

Pre-chop vegetables into 1 to 2 inch pieces. Once your marinade is prepared, let the vegetables steep in it for 30 minutes to an hour. Don’t leave any longer than this or your veggies will be mushy. Thread the pieces onto a skewer for veggie shish kabobs. Heat grill to medium-high (350 or 400 degrees) and place skewers on grill plate. Grill for 10-12 minutes, turning once about halfway through. Veggies are done when they can be pierced easily with a fork.

Go back to BBQ Recipes from Grilled Vegetable Marinade
Go back to iGrillBBQ Home from Grilled Vegetable Marinade

Categories
Bar-B-Q Recipes Grill Sauces

Grilled Steak Marinade

Unless you’re grilling filet mignon for your backyard barbecue crowd, you may find that the cut of meat you purchased needs a little help to make it tender. And since most of us won’t be buying top dollar cuts of meat on a regular basis, we need a reliable, delicious way to tenderize our grilled steak. Good news! Grilled steak marinade not only produces tender, flavorful steak every time, but it also gives you a chance to show off your culinary prowess and get creative with flavors.

How to Make a Great Grilled Steak Marinadegrilled steak marinade

The tenderizing process of a good marinade happens as the acidic element (usually citrus or vinegar) begins to break down the fibers of the meat. For the best results, leave the steak in the marinade for several hours or overnight before grilling.

Most marinades consist of oil, an acid like lemon juice or balsamic vinegar, and seasonings. You can easily create your own by determining what flavor family you’re aiming for (sweet, savory, Asian, spicy, etc.) and combining ingredients to produce the desired effect. Common ingredients include garlic, soy sauce, herbs, brown sugar, and shallots.

Place the steak in a zip top bag or glass dish and turn at least once to make sure all sides of the meat come into contact with the marinade. If you like, you can reserve some of the marinade to use for basting later. Discard any leftover marinade that has come into contact with the meat in order to prevent the spread of bacteria.

Delicious Grilled Steak Marinade Recipes

While a lot of chefs enjoy experimenting with flavors, some of us just need a recipe to follow. Here are some delicious ones to get you started.

  • Balsamic and Soy–1/4 c. olive oil, 1/4 c. balsamic vinegar, 1/4 c. soy sauce, 2 cloves chopped garlic, 1 Tbsp. rosemary, 1 tsp. salt
  • Spicy Garlic Herb–1/2 c. olive oil, 1/3 c. lemon juice, 1/4 c. Worcestershire sauce, 1/4 tsp. hot sauce, 2 cloves chopped garlic, 3 Tbsp fresh chopped basil, 1 tsp. black pepper
  • Maple Soy–Equal parts maple syrup, soy sauce, and balsamic vinegar. Add 2 chopped garlic cloves.

Finishing Well

When the steaks have finished marinating, remove them from the zip top bag and pat dry. Place on the grill over high heat and cook for 8-10 minutes, turning occasionally. This will result in a medium-cooked steak. Leave on the grill a minute or two longer for well-done, and a minute or two shorter for rare.

Go back to BBQ Recipes from Grilled Steak Marinade
Go back to iGrillBBQ Home from Grilled Steak Marinade

Categories
Bar-B-Q Recipes Grilling Tips

Pizza

Pizza on the grill? You bet! If you love the taste of wood-fired pizza, you’ll be amazed at how closely you can approximate that taste on the grill in your own backyard. Once you’ve tried it, grilled pizza will become one of your favorite go-to backyard barbecue recipes.

Why Grill Your Pizza?pizza

When it’s so easy to bake in the oven, why would you choose to grill your pizza instead? First, because you don’t have to heat up your oven, and in the summer time, you want to avoid as much heat in the house as possible! Grilling pizza gives you an alternative to traditional barbecue menu options while still allowing your to keep the heat outside, not inside.

But the best reason to grill pizza is that it’s so distinctively delicious. There is nothing like that smoky, slightly charred crust when you bite into a homemade grilled pizza. I guarantee you’re going to love it.

What’s Different About Making Pizza on the Grill?

The primary difference is that you start grilling the crust before you add the toppings. This way, you ensure that the crust gets done all the way through and you don’t end up with sticky dough in the middle. Of course, this means you’ll need to have everything prepared ahead of time and be ready to quickly top the pizza halfway through grilling. Once you’ve grilled one side of the dough, you’ll flip the pizza, remove it from the heat, brush the grilled side with olive oil, and add your toppings. Then, return the pizza to the grill to finish cooking.

Grilled Pizza Recipe

Ready to give it a try? Here’s a step-by-step recipe you can use tonight!

  • Make or buy your pizza dough. You can buy fresh dough from many grocery stores or pizzerias.
  • Spread dough into desired shape. An oblong pizza may fit your grill better than a traditional round shape.
  • Oil grill plates to prevent sticking and heat to medium high for direct heat grilling.
  • Transfer pizza dough to hot grill using a rimless cookie sheet or pizza peel.
  • Grill the dough for 5-6 minutes, watching carefully to see when it begins to brown. When you see nice brown grill marks, remove the pizza from the grill using your cookie sheet and spatula.
  • Now for the fun part! Flip the pizza over so that the grilled side is up. Brush with oil and top with sauce and all your favorite toppings. Be careful not to spread the toppings too thickly or the pizza may not grill all the way through.
  • Return the pizza to the grill and close the lid. Grill for 5-6 more minutes, or until the crust has turned golden brown and the cheese has melted.
  • Serve and enjoy!

That’s it! While it may take a time or two to figure out the best heat and cooking time based on your grill, you will be so glad you stuck with it once you have perfected your grilling technique.

Go back to BBQ Recipes from Pizza
Go back to iGrillBBQ Home from Pizza


Categories
Bar-B-Q Recipes Grill Sauces

Grilled Salmon Marinade

Marinating salmon adds a textured flavor palette to an entrée that already holds pride of place in the grilled fish arena. Salmon is more robust than many other types of fish, making it a perfect choice for the grill. Adding a delicious marinade will create an dish that will become a staple of your backyard barbecue repertoire.

Creating a Grilled Salmon Marinade

You can buy a marinade, of course, but if you want to exhibit your culinary prowess, a homemade marinade gives you the opportunity to try a variety of different spices and flavors. Start with an olive oil base, add an acid like citrus juice or vinegar, and season with any spices you like. The salmon should remain in the marinade for 30 minutes to an hour at the most. If you leave it any longer, the fish will become mushy.

You can save the marinade to use as a sauce if desired; just be sure to heat it to a boil before using in order to kill any bacteria left from the raw fish.

How to Marinate Salmongrilled salmon marinade

Create the marinade of your choice and pour into a wide, shallow dish. Place fish into the marinade for about 30 minutes, turning once. You can also put the marinade and fish into a zip top bag. Refrigerate the fish while marinating. When the marinating process is finished, remove the salmon and place immediately onto the grill over medium heat. Grill for six to eight minutes on each side. If you want grill marks, increase the heat for the last couple of minutes and cook for one or two additional minutes per side.

Grilled Salmon Marinade Recipes

You can create any marinade flavor you wish to lend just the right touch to your grilled salmon. Try these ideas to get you started, but don’t be afraid to experiment!

Lemon Herb–Combine 2 Tbsp olive oil, the juice from 1 lemon, and 1 tsp of fresh thyme or rosemary.

Soy and Ginger–For an Asian flavor, begin with 1/4 c. olive oil and 3 Tbsp. soy sauce. Add 1 Tbsp. finely chopped ginger, 2 cloves finely chopped garlic, and chopped scallions if desired. Add any additional herbs you like. You can also add sesame seeds and a tablespoon of sesame oil for a slightly different Asian taste.

Pineapple and Brown Sugar–Whisk together 1/4 c. brown sugar, 1/4 c. pineapple juice, 1 tsp. dijon mustard, 1 Tbsp olive oil, and 2 cloves finely chopped garlic. If desired, make a delicious pineapple salsa using grilled pineapple. Serve over salmon after grilling.

You can tweak these recipes to suit your own tastes (try adding some soy sauce, honey, or ginger to alter the flavor slightly), or create your own from scratch. Sweet marinades and glazes complement the flavor of the salmon beautifully, while savory or spicy ingredients will add some flair to your dinner.

Go back to BBQ Recipes from Grilled Salmon Marinade
Go back to iGrillBBQ Home from Grilled Salmon Marinade


Categories
Bar-B-Q Recipes Grill Sauces

Grilled Shrimp Marinade

Whether you’re grilling seafood or steak, a skewer of shrimp on the side makes a delicious complement to your outdoor barbecue. Shrimp grill quickly, and you can flavor them to work well with any meal using an easy marinade. Marinating your shrimp will give them an extra boost of flavor, and when combined with the smoky texture of the grill, your guests will be demanding to know your culinary secret.

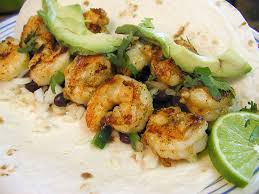
Grilled Shrimp Marinade Basicsgrilled shrimp

It’s easy to create a basic shrimp marinade from scratch. Just follow these simple steps:

  • Begin with an oil and acidic base. The acid–lemon juice, vinegar, etc.–will begin to break down the protein fibers, which is what allows the shrimp to absorb flavor and retain moisture.
  • Add fresh garlic and fresh herbs. You can match the herbs to the style of the meal. For instance, use oregano and basil for an Italian flavor, and sesame seeds and ginger for an Asian flair. Looking for a taste of Mexican? Try cilantro, red pepper flakes, and a dash of hot sauce.
  • If desired, reserve a portion of the marinade for basting.
  • Marinate the shrimp for no longer than an hour. Longer marinating times should be reserved for more robust meats like steak and chicken. Shrimp and fish will get mushy if left in the marinade for too long.

Grilling the Shrimp

Once your shrimp has marinated for 30 minutes to an hour, put them on skewers for grilling. Spray the grill plate with oil to prevent sticking and heat the grill to medium. Place shrimp over heat and grill for 5 minutes per side. If you reserved part of your marinade for basting, brush onto shrimp several times during the grilling process.

Do not baste with leftover marinade that your shrimp has been sitting in. There will be bacteria left from the raw shrimp. You can, however, heat this marinade to boiling to kill the bacteria if you want to use as a basting sauce.

Grilled Shrimp Marinade Recipes

While it’s fairly easy to make your own marinade, you can use these recipe ideas to get your creative juices flowing:

Italian Herb–1 c. olive oil, juice from 1 lemon, 2-3 cloves minced garlic. 1 tsp. each of oregano and black pepper, and 1 Tbsp. tomato paste.

Honey Lime–1/2 c. olive oil, juice from 1 lime, 1/4 c. honey, 2 cloves minced garlic

Lemon Herb–1/4 c. olive oil, juice from 1 lemon, 1/4 c. fresh, chopped cilantro, 1 clove chopped garlic, 2 tsp. chopped basil

Once you have mastered these recipes, try changing them up a bit by adding your own ingredients. You’ll have your friends and family begging for more!

Go back to BBQ Recipes from Grilled Shrimp Marinade
Go back to iGrillBBQ Home from Grilled Shrimp Marinade 


Categories
Bar-B-Q Recipes Grill Fruit

Grilled Pineapple

One of the most delicious flavors on the planet is freshly grilled, juicy pineapple sprinkled with cinnamon. If you don’t believe it, you haven’t tried it! While it’s tough to top a freshly sliced pineapple in the flavor department, throwing it on the grill is a flavor-enhancing game-changer. Ready to give it a whirl? Here’s what you need to know.

How to Make Grilled Pineapplegrilled pineapple

Pineapple is one of the easiest fruits to grill. It doesn’t fall apart easily, cooks quickly, and tastes wonderful with absolutely no help. Of course, you can add some seasonings or glazes if you want to, but let’s start with the basics.

  • Choose a fresh pineapple. This might seem obvious, but choosing the right fruit makes all the difference in how the finished product will taste. Smell the pineapple as you’re shopping. A ripe one will have a noticeably sweet scent.
  • Remove the outer peel and core. Slice into rings or strips. Brush each piece with oil or butter to prevent sticking.
  • Heat grill to medium-high.
  • Place pineapple pieces on the grill plate and cook for 2-3 minutes per side, or until grill marks appear. You’ll notice a lovely caramelizing of the fruit as it gets hot. This is what makes it so delicious!

Making Grilled Pineapple Even Better

There are several ways you can dress up your grilled pineapple to create a truly unforgettable dish. Here are a few favorites:

  • Brown Sugar and Cinnamon–Make a brown sugar and cinnamon mixture and coat each pineapple piece before grilling. Be sure to oil the grill plate before grilling.
  • Honey and Citrus Glaze–Create a glaze using 1 part lemon or lime juice to 3 parts honey. Add a dash of black pepper for a spicy flavor. Brush glaze over each pineapple slice before grilling.
  • Spicy Honey Marinade–Marinate pineapple pieces in honey, melted butter, and a dash of hot pepper sauce. Place in refrigerator for at least 30 minutes.

Serving Suggestions

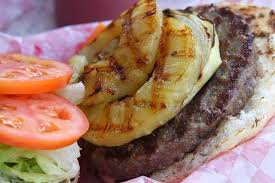
Serve grilled pineapple as an appetizer, a side dish, or a dessert. It pairs especially well with fish, but also makes a great complement to pork, chicken, and beef. You can add it to salads, dice it up for salsa, or even put it on a hamburger. Preparing the pineapple with a sweet glaze makes it a delicious dessert option served alone or with vanilla ice cream.

No matter which way you slice it, grilled pineapple will soon become a family favorite and a frequent request at all your backyard barbecue events.

Go back to BBQ Recipes from Grilled Pineapple
Go back to iGrillBBQ Home from Grilled Pineapple Page

Categories
Bar-B-Q Recipes Grill Fruit

Grilled Pears

Are you grilling pork tonight? How about fish or chicken? Sausages? If you’re looking for something different to complement any of these meats–something other than the ubiquitous baked potato–try adding grilled pears to your menu. The mild, sweet flavor of pears works well both as a dessert and as a complement to any number of other dishes.

Basics for Grilled Pearsgrilled pears

Like many other grilled fruits, grilled pears are simple, quick, and easy to get right. You’ll be amazed at how delicious they can be with just a hint of smoked flavor from the grilling process.

Start by slicing your pears in half and scooping out the center. You can peel if desired, but grilled pears also turn out well when you leave the skins on. Brush each piece with olive oil to prevent sticking. Heat your grill to medium-high and place pears directly on the grill plate. Grill for about 10 minutes, or until grill marks appear and pears feel slightly soft. Serve them as-is or add them to a recipe for a delicious summer dish.

Serving Ideas for Grilled Pears

With your pears fresh off the grill, you can add them to a variety of recipes. Try these ideas to get you started:

  • H’ors Doeuvre–Slice pears into half-inch thick pieces. Grill for 5-10 minutes. Place each pear slice on a piece of toasted french bread, spread with cream cheese or goat cheese, and drizzle with honey for a delicious bruschetta.
  • SaladChop grilled pears into cubes and serve with mixed greens, walnuts or almonds, and feta cheese.
  • Side dishBrush with a mixture of hot sauce and olive oil for a spicy side. After grilling, fill centers with blue cheese or your favorite soft cheese.
  • Dessert–Serve with vanilla ice cream and drizzle with caramel sauce for a sophisticated meal encore.

Gaining Confidence on the Grill

Becoming a true grill master means being willing to try new ideas and utilizing the grill to its fullest potential. One of the ways to learn what your grill is capable of is to experiment with unusual menu items like grilled vegetables and fruit. Pears offer a good starting point because they have a firm texture that holds up well under grilling and they offer a mild flavor that works with a variety of meat entrees.

Next time you fire up the grill for your famous pork chops or chicken, try adding a few pears to the mix. Your guests (and your family!) will be impressed with your culinary prowess–and they’ll be asking for more!

Go back to BBQ Recipes from Grilled Pears
Go back to iGrillBBQ Home from Grilled Pears Page

Categories
Bar-B-Q Recipes Grill Fruit

Grilled Peaches

Are you looking for a way to use your summer peaches? Hoping for an alternative to peach pie or cobbler? Then you need to try peaches on the grill! Grilled peaches are deliciously caramelized with a unique flavor you can only achieve by grilling. They make wonderful desserts, but you can also branch out and serve them as a side dish, a meat garnish, or a fabulous breakfast option.

The Secret to Perfect Grilled Peaches

The secret is that grilled peaches are super easy! With this one simple technique, you’ll be creating delicious grilled peach dishes that your family and friends swoon over. Good-bye frozen peach cobbler from the grocery store. Hello delicious, fresh from the grill perfection.

  • Heat grill to medium-high.
  • Slice peaches in half and remove pits. Brush with oil.
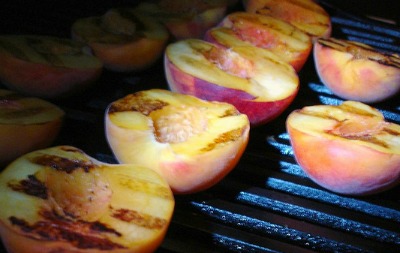
  • Place cut side down on grill for about 5 minutes, or until you see grill marks.
  • Turn peaches over and grill a few more minutes, until grill marks appear and peaches begin to soften.

That’s it! Now, top those peaches with something delicious like honey, cinnamon, ice cream, whipped cream, or yogurt.

grilled peaches

Grilled Peaches in a Foil Packet

Another way to grill peaches is to put them in a packet made of aluminum foil and grill over medium heat. Slice peaches into eighths and remove skin if desired. Place in the center of an aluminum foil square. Drizzle with honey and sprinkle with cinnamon. Fold the edges of the foil up around the peaches and crimp the edges to make a sealed packet. Place packet on pre-heated grill for about 10 minutes. Serve peaches over scones or with vanilla ice cream. Be sure to save the delicious juice left in the pouch for a sweeter dish!

More Serving Ideas

Here are some additional ways you can serve your grilled peaches:

Grilled Peach Salad–Drizzle peaches with honey and sprinkle with cinnamon. Toss with spring greens, blueberries, almonds, and feta cheese.

Cinnamon Honey Butter Peaches–Melt two tablespoons of butter and stir in honey and cinnamon to taste. Drizzle over peaches and serve with vanilla ice cream.

Peaches ‘n Cream–Fill the centers of grilled peaches with Greek yogurt and drizzle with honey. Garnish with fresh mint. Serve as a breakfast dish or hors d’oeuvre.

Peach Heaven–Grill peaches using the foil packet method. Serve with a slice of angel food cake and drizzle generously with the juice from the packet. Top with a dollop of whipped cream.

Go back to BBQ Recipes from Grilled Peaches
Go back to iGrillBBQ Home from Grilled Peaches Page


Categories
Bar-B-Q Recipes Grill Fruit

Grilled Nectarines

Grilled fruit makes the perfect complement to any meat or fish entree, and it also delivers a spectacular grand finale to your meal as a dessert. If you’ve never considered tossing fruit on the grill, try adding it to your menu the next time you fire up the barbecue.

Looking for some ideas to get you started? Try grilled nectarines as a delectable summer choice. Nectarines work well on the grill because they have firm flesh that won’t get mushy under heat, they caramelize well, and their flavor is subtle enough to pair with a variety of entrees or dessert options.

Perfect Grilled Nectarines Every Time

Mastering your grill technique for fruit dishes will open doors to a wide variety of recipe options. Once you have the basic idea, you can experiment with different flavors and textures.

  • Heat grill to medium-high.
  • Slice nectarines in half and remove pits.
  • Brush with butter or oil to prevent sticking. Butter will add a nice flavor to the finished product.
  • Place on clean grill plate, cut side down, for about 4-5 minutes, or until you see grill marks.
  • Turn nectarines over and cook until grill marks appear on the other side.

Another grilling method for nectarines is the foil packet. Cut nectarines into wedges and place inside an aluminum pouch. Add any desired seasonings, and then seal the packet. Place on the grill over medium heat for about 10 minutes, or until the nectarines begin to soften. Open and enjoy!

Recipe Ideas for Grilled Nectarinesgrilled nectarines

Grilled nectarines make wonderful side dishes, breakfast choices, and desserts. Try some of these recipes to get your creative juices flowing.

Grilled Nectarines with Cheese–Halfway through the grilling process, sprinkle nectarines with feta cheese and pepper. Serve with grilled pork or fish, or as a breakfast dish.

Honey and Cinnamon Nectarines–Place nectarines in foil pouch as described above. Before sealing the pouch, drizzle the fruit with honey and sprinkle with cinnamon. Serve with a dollop of Greek yogurt or whipped cream.

Grilled Nectarines with Balsamic Vinegar–Brush nectarines with Balsamic vinegar before placing on the grill. Baste with the vinegar two or three additional times during the grilling process. Serve as a garnish over pork tenderloin or with ice cream for dessert.

Grilled Nectarine Salad–Drizzle nectarines with honey and grill as described above. Serve in a salad with mixed greens, sliced almonds or walnuts, and honey dijon dressing. Sprinkle with crumbled feta or blue cheese.

Try Your Own Recipes!

Grilled nectarines are a wonderfully versatile dish, so don’t be afraid to experiment. Try sweet dishes incorporating cinnamon, honey, nutmeg, ice cream, yogurt, brown sugar, and other delicious accoutrements, or opt for a more savory dish using cheese, pepper, and a savory sauce. Either way, you won’t be disappointed!

Go back to BBQ Recipes from Grilled Nectarines
Go back to iGrillBBQ Home Page from Grilled Nectarines