Categories
Grilling Tips

How to Grill Chicken Thighs

Figuring out the best way to grill chicken thighs does not have to be an exercise in futility. Try these handy tips for doing chicken thighs on the grill.

Some people seem to think that the breast is the only part of a chicken that can be cooked effectively with a grill. Fortunately, this is not the case.

How to Grill Chicken Thighs: Preparing the Meat

In the preparation stage, make sure to remove as much of the excess fat as possible. Fat will melt and drip onto the coals causing flare ups. Flare ups will scorch the exterior of your meat and make it looked burned.

You also want to wash the meat thoroughly, especially if you plan to season the pieces before placing them on the grill. Seasoning your chicken before grilling is a great way to maximize the flavor. Keep in mind that more important than the type of seasoning you use is how you apply it. As much as possible, you should try to get the seasoning directly onto the meat because the skin acts like a barrier and prevents the flavor from infiltrating the meat.

How to Grill Chicken Thighs: Cooking the Meat

Use a wire brush to clean the grate before placing your meat on the grill. Then, apply a small amount of vegetable oil to the grate to prevent the meat from sticking.

If you ask any pro about grilling chicken thighs he will tell you to cook them slowly under medium to low heat. Position the meat toward the extremity of the grill grate. Keep a close watch for flare ups. If the flames flare up from melted fat dripping into the fire you can either remove the chicken from the grill till the fire dies down, or you can grab the meat with tongs and shake the liquid fat off into the fire or onto the ground.

Check the meat periodically and turn over when the bottom becomes firm and brown. Rearrange the pieces on the grill as necessary if one area is cooking faster than another.

How to Grill Chicken Thighs: Finishing the Meat

Shortly before the chicken thighs are finished, close the vents on your grill and douse the meat with several layers of barbecue sauce. Let the chicken sit on the grill for just a couple of minutes afterward to give the sauce time to seep into the meat. If you want, you can turn the chicken and repeat this step prior to removing it from the grill. These grilled chicken thighs will be yummy!

Dispel any doubt that grilling chicken thighs is easy by following these couple of helpful suggestions.

Go back to BBQ Tips Main Page
Go to iGrillBBQ.com Home Page from How to Grill a Chicken Thigh
Categories
Grills by Brand

Bakers and Chefs Grills

A Bakers and Chefs grill is quick to assemble, easy to use, and competitively priced. For an optimum grilling experience, don’t overlook what these grills have to offer.

What you will get is a model from a line of premium gas grill that will be sure to make any outdoor barbecue a cinch.

Bakers and Chefs Grills: Information

These grills are produced exclusively by Sam’s Club. Customers praise them for their ease of use and durability. Several consumers have discussed their efforts to convert the type of fuel that the grill uses. By and large these efforts were successful, leading to positive customer reviews.

The Sam’s Club website provides an easy-to-navigate section of its website where customers can order replacement parts. In particular, the burners on a Bakers and Chefs grill will sometimes wear out more quickly than other parts.

Most reviews were positive when indicating customer satisfaction with the replacement service they received. One problem that a few customers noted was that food can tend to stick to the grate of the grill. This, however, does not seem to be a problem with the grill itself, but with the preparation of the grate prior to grilling. A number of reviewers mentioned that if you grease or oil the grate immediately before placing food on it, the food has much less of a tendency to stick and fall apart.

Bakers and Chefs Grills: Models

The most popular of these models is the Main Event Grill. This is a durable, long-lasting gas grill. Customers rave about its ability to handle large quantities of food on a regular basis for extended periods of time. This seems to be an ideal component for a successful company or church outing. It could also serve well as an addition to a roadside barbecue stand.

Bakers and Chefs Grills: Are They Right for You?

Most of the grills available appear to be more along the lines of industrial sized grills. If you typically grill for small groups on an infrequent basis one of these models might be overdoing it a little bit. However, if you are a grilling enthusiast or if you run a concession stand, something in this line of Bakers & Chefs grills is probably just what you need. Check out what they have to offer and see how you can take your grilling skills and experience to the next level. You won’t be sorry you did.

Go back to Grill Brands Main Page
Go to iGrillBBQ.com Home Page from Bakers and Chefs grill

Categories
Grills by Brand

New Holland Grills

Those who have found standard gas grills rather frustrating to operate have discovered that new holland brand grills hold the solution to their barbeque problems.

Holland’s unique drip-pan configuration eliminates flare-ups from dripping juices, guaranteeing consistency and evenness in the delicious meals that come off your grill. Read on to see how this grill can transform your grilling experience.

New Holland Grills: Information

Backyard BBQ enthusiasts have often experienced annoyance and even a ruined meal by having their carefully prepared meats burned by flare-ups due to dripping grease. The Holland System, developed about twenty years ago, takes care of this problem by placing a drip pan between the grill rack and the flame.

Instead of causing destructive flare-ups, the juices from grilling meats sizzle on the drip pan and create smoke that makes your barbecue even better.

Holland advertises that you can simply close the lid and cook by time, eliminating the need to constantly check the grill and adjust the placement of meat.

New Holland Grills: Models

New holland brand grills are available in a variety of models, from the “Companion”, a small portable grill ideal for camping or tailgating, to the “Patriot,” which incorporates the patented Holland System in a charcoal grill. Other available models feature a stainless steel body, storage cabinets, and a separate infrared searing grill. Although Holland does not sell directly to consumers, their grills can be found at many local retailers. 

New Holland Grills: Are They Right For You?

Grilling in the backyard, at a company picnic, or for a social event should be enjoyable. If you are spending an entire picnic standing over a flaming grill trying to keep your meat cooking evenly, you are missing out on the joys of grilling! Holland advertises that you can simply close the grill’s lid and cook by time, leaving you more time for enjoying your event.

If you are looking for a grill that makes barbequing a fun, simple, easy, and greatly rewarding experience, you should definitely visit your local retailer to take a look at a new Holland grill.

Go back to Grill Brands Main Page
Go to iGrillBBQ.com Home Page from New Holland Grill

Categories
Grilling Tips

How to Cook Pork Chops on the Grill

Have you ever grilled a pork chop and have dry out by overcooking it on the grill? How to cook delicious pork chops on the grill can be foolproof if you follow these tips.

How to Cook Pork Chops on the Grill: Tips on Buying the Right Cut

Before you do anything else you have to make sure you buy the right cut of meat. The best thickness for pork chops is between 1″ and 1-1/2 “. If the chop is less than one inch and you run the risk of overcooking, burning or drying out the meat. If your pork chops are more than 1-1/2 inches you run the risk of ending up with slightly raw meat. Whether you grill your pork chops without the bone or with the bone in is a matter of personal choice, but it appears that the majority of grilling experts prefer the bone in.

How to Cook Pork Chops on the Grill: Tips on Preparing Your Pork Chops for Grilling

A recurring problem when cooking pork chops on the grill is the meat losing moisture and drying out from cooking. One way to combat this problem is a process called “brining”. Mix up some brine, also known as salt water, with one cup salt for each gallon of water. Soak the pork chops in the solution overnight before cooking.

This will ensure that the pork chops will come out moist and soft every time. Pork chops are so tasty on their own that good old pepper and salt will more than suffice for many people. Of course you can experiment with various marinades and rubs.

How to Cook Pork Chops on the Grill: Tips on Cooking Your Pork Chops on the Grill

First thing is to get that grill as hot as it will go. Then place the chops on the grill and sear them with the lid down. This usually takes one minute per side. Visually it means the meat browns and fat will crisp up. Finish them off 4 minutes per side on a low to medium heat with the lid down.

Your pork chops should be cooked and ready to eat except for one more important step than many people over look when grilling chops. You must allow them to rest for a while, at least ten minutes. By allowing your pork chops to rest, it allows them to begin cooling off. When the chop begin to cool the moisture gets drawn back into the center of the meat making the chops thick and juicy, just the way you want them.  Hope you’ve learned how to cook delicious pork chops on the grill!

Go back to BBQ Tips Main Page
Go to iGrillBBQ.com Home Page from How to Cook Pork Chops on the Grill

Categories
BBQ Review

Traeger Grills Reviews

Are you looking for a grill that combines versatility with ease of use? If these are your priorities, Traeger grills reviews found on the internet can help you decide on your next bbq grill purchase.

Customers who have tried out the Traeger system describe the simplicity of its operation. The electric-based ignition and easy temperature control make this a grill that even the least experienced barbecuer can operate successfully. Enjoy my Traeger grill review.

Traeger Grills Reviews: Pros and Cons

Pros:
Reviewers seem united in giving top marks to the flavor of the food that comes out of their Traeger grills. Reviews consistently praise the great taste and even cooking of meat, vegetables, and even desserts like cobblers.

Ease of use is the other main benefit of this particular grilling system; other than refilling the grill with wood pellets (its heat source) occasionally, the only work required is to plug the ignitor into a normal electrical socket and set the temperature control knob. The general consensus seems to be that it is difficult to get anything but great-tasting food out of this grill!

Check out Traeger Grills on Amazon.com!

Cons:
Apparently, although these grills were constructed by a U.S.-based company at first, cost and demand have forced construction to be outsourced to other countries. Some customers report that these foreign-made versions are put together with less care and that numerous of the parts have to be replaced more frequently than expected.

Another disadvantage is the relatively high price of a Traeger grill. Reviewers agree that the extra cost is equal to the superb taste quality it produces, but for some customers the price may simply be prohibitive.

Traeger Grills Reviews: Analysis

If your priorities include the ability to grill a wide variety of foods with success, this grill deserves your close attention. When the lid is closed, heat surrounds the grill rack, cooking food thoroughly and evenly. Starting and maintaining the temperature couldn’t be simpler, requiring roughly the same work as using a kitchen oven.

Because the starting mechanism is electrically based, a storage space protected from weather would be ideal for long-term functioning. If your budget allows and you can obtain a warranty to protect against possible malfunctions, the conclusion among reviewers is that you will not regret investing in this revolutionary product.

Traeger Grills Reviews: Where To Buy

Traeger Grills can be purchased online!

  • Go here=> Amazon.com (You’ll go straight to the Traeger Amazon page)

Go back to Grill Reviews Main Page
Go to I Grill BBQ.com Home Page from Traeger grills reviews

Categories
Grilling Tips

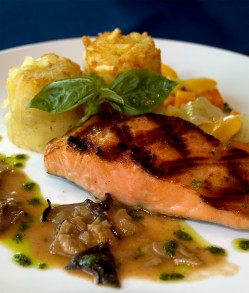
How to Grill a Salmon Fillet

Are you looking for the wow factor for your next neighborhood cookout? Knowing how to grill salmon is the key.

Grilled salmon is a great addition to any barbecue event, and these easy to follow tips separate the chefs from the cooks.

How to Grill a Salmon Fillet: The Selection

The most important thing is to pick the right salmon fillet, and the best cut of fillet comes from the head end of the salmon; tail-end fillets tend to be too thin and don’t work well on the grill. Though thick cuts are best (about 1 inch), don’t feel like you have to slice off the thinner end of the tapered fillet; some guests may prefer their salmon more done than others, and the thinner end fits the bill as it will cook through more quickly.

You can pick fillets with either the skin on or the skin off, depending on the recipe you use. Once you are confident that you know how to grill salmon fillet, you can experiment with different types of salmon and different cuts.

How to Grill a Salmon Fillet: The Preparation

Once you’ve decided whether you are going to leave the skins on or remove them, make sure all the bones are out; no one likes to get a bone in an otherwise tasty bite and then have to fish it out of his mouth. Rinse the fillets and pat them dry.

Apply any lemon juice, seasonings, and/or rubs to the fillets and let them sit for about 15-20 minutes before placing them on the grill; it is best to grill meat at room temperature to keep them from cooking too quickly on the outside.

How to Grill a Salmon Fillet: The Grilling

You want the grill to be hot, hot, hot—about 500 degrees—before placing the salmon fillets on the grill. You also want to the grill to be clean, so take time to scrub away the remains of your last cookout and then apply a thin layer of oil, such as a cooking spray or oil rubbed on using tongs and a cloth.

You may even want to try your hand at using different flavored wood chips for a nice smoky taste. If you are using fillets that still have their skins on, start out cooking them skin side up for about 5 minutes over direct heat; then carefully flip the fillets using a spatula that is large enough to accommodate the entire fillet and cook another 5 minutes.

When the fish is pink and flaky, use the spatula to separate the fillet from the skin. Serve it up with your favorite side and you will prove to everyone that you know how to grill salmon.

Go back to BBQ Tips Main Page
Go to iGrillBBQ.com Home Page from How to Grill a Salmon Fillet

Categories
Grilling Tips

How to Grill Salmon on a Gas Grill

The gas grill is not just for cooking hamburgers and hot dogs for the big game; step up your game by learning how to cook salmon on the grill.

Everyone loves to cook on a gas grill, and the more options you have for cooking outside means beating the heat of the kitchen inside.How to Grill Salmon on a Gas Grill

How to Grill Salmon on a Gas Grill: Pick It Up

When shopping for salmon, be sure to select thick, head-end fillets; about a 1-inch thickness is perfect for the gas grill. Depending on the recipe you are using, you may want to buy fillets with the skin still on.

After you have cleaned the fish in cold water and patted dry, add the flavor combinations you like best: lemon juice and garlic, seafood rubs, or even mayonnaise and season salts. Let your prepared fillets sit for about 15-20 minutes to reach room temperature before placing them on the grill.

Salmon Grillin’ Set Up

The key to a successful grilling experience, especially when it comes to fish, is a clean grill. Using a wire brush, scrub off the remains of your last barbecue extravaganza and oil the rack; a light cooking spray applied over the grill will keep the salmon from sticking to the grill. Another trick is to use heavy-duty aluminum foil on the grill, either as a packet or like a cookie sheet; this is especially helpful if you are using skinless salmon fillets.

You should still coat the foil with oil, unless you are using a recipe that calls for coating the fillets in mayonnaise. Preheat the grill and turn the burners to a low setting.

BBQ’n that Salmon: Cookin’ It Up

It’s time to put the salmon on the grill. If you are using fillets with the skin still on, place the meat with the skins facing up. Close the lid of the grill, and let the fish cook for about 5 minutes; only open the lid when you are ready to flip the fish.

Then close the lid and cook for another 4-5 minutes. You know the salmon is ready when it is pink and flaky. If the skin is still intact, use a spatula to separate the fish from the skin. Then serve it up hot off the grill. Your family and friends will be amazed that you know how to cook salmon on the grill with all the expertise of a gourmet chef.

Go back to BBQ Tips Main Page
Go to iGrillBBQ.com Home Page from How to Grill Salmon on the Grill

Categories
Grilling Tips

How to Grill Chicken on the Stove

If you know how to grill chicken on the stove, you can bring that outdoor goodness right into your kitchen. All you need is the right equipment and the right techniques.

Here are some tips to help with grilling chicken on the stove.

How to Grill Chicken on the Stove: Start with a Cast Iron Grill Pan

Athena 6300 Max Burton Stove Top Smoker pack of 4
Click here and check out this stove smoker!

Indoor grilling is a convenient and healthy way to cook while bringing out the fun and flavors of outdoor grilling. A grill pan, sometimes called a riffle pan, can convert any stove top into a grill. Get a good heavy cast iron grill pan that is already seasoned so it will not stick. These pans are cheap, easy to clean, easy to maintain, last a lifetime and it can be put right into the oven.

How to Grill Chicken on the Stove:Start with Good Ingredients

Do not compromise on the quality of the chicken. Get the best you can afford. Organically raised chickens are the best in both taste and healthy eating, but they are expensive. So called “all natural” is still quite good and a little cheaper. You should try, at the very least, to get free-range quality chicken.

Check this out! Makes a great gift!=> Athena 6300 Max Burton Stove Top Smoker pack of 4
If you have to settle for grocery store off the shelf chicken, search out the brand that injects the least amount water and other chemicals into the bird. You many also want to invest in a instant-read meat thermometer. With chicken, you have very little room between under cooked, with unpleasant thoughts of salmonella, and overcooked, with the meat having the dry, hard texture of footwear.
The thermometer helps you find that narrow range of tasty juiciness that eludes so many cooks while giving piece of mind that the chicken is cooked thoroughly. Your indoor grilled chicken will be be guaranteed done at 165°F.

How to Grill Chicken on the Stove: Grilling it Right

For perfectly grilled chicken every time use the following tips. Turn up the burner to high with the grill pan on top of your stove. You can heat it up until you have to turn on the exhaust fan because the pan is smoking a bit. Coat the chicken in olive oil and coat it with your favorite seasoning.

Once in lifetime opportunity! => Athena 6300 Max Burton Stove Top Smoker pack of 4

Put the chicken in the hot pan for one and half minutes per side so it is seared with distinct grill marks. Then turn the heat down to medium (375°F) and continue cooking. Usually it will be about five minutes per side, but be careful not to over cook. This is when the thermometer comes in handy and you can start checking for done chicken.
After the chicken is finished, take it out of the  grill pan and let it set a while before serving. Cooling a little lets the juices flow back to the center of the meat, insuring it is soft and moist. You can serve it up and show everyone you know how to grill chicken on the stove.

Go back to BBQ Tips Main Page
Go to iGrill BBQ.com Home Page from how to grill chicken on the stove

Categories
Grilling Tips

How to Grill Chicken on a Gas Grill

Most people think they know how to grill chicken – just throw the chicken on the grill until it is cooked and dried out. Here are some tips to keep that chicken moist, juicy and tasty.

Grilling chicken thighs on gas grill (or wings, etc.) is a traditional bbq favorite. With a little patience and care, chicken cooked over a gas grill can be a very special all season treat.

How to Grill Chicken on a Gas Grill: Be Kind to Your Bird

Though chicken is one of the popular meats for grilling and bbq, it is also one of the most abused. Fear of under cooking drives many cooks to grill chicken into shoe leather. Plus, chicken dries out faster than most meats. Salmonella is a real concern, but it is not a good reason to turn chicken parts into hockey pucks.

You can be perfectly safe while leaving all those wonderful juices and flavors in the meat. A meat thermometer is a good inexpensive investment. When that chicken reaches 165°F you can rest assured the meat is cooked with the juices still flowing. With no thermometer, there is always the temptation to over cook for safety’s sake. We all want to be safe, but we do not have to destroy dinner to do it.

How to Grill Chicken on a Gas Grill: Some Certain Steps

Wash the chicken thoroughly. Cover the bird with your choice of spices. Be sure not to miss any parts. Heat the grill to about 240° and coat it with oil. Place the chicken on the grill, close the lid and turn it about every ten minutes. After 30 minutes start checking the thermometer. The chicken is done when the inside reaches 165°F. At this point, the outside of the chicken will be golden brown.

How to Grill Chicken on a Gas Grill: Tips on Indirect Cooking

This can be done on any gas grill with multiple burners. Turn the burners up high and run for a few minutes until everything is hot. Turn a burner all way down and place the chicken over the turned off burner. Close the lid and let the grill do its thing. This method is a little slower, it takes about ten minutes longer, but you are less likely to accidentally over cook the chicken.

When grilling with gas, you have the luxury of greater control over the heat when compared to other types of grills. This is very helpful when you are cooking sensitive meat like chicken.

Here one final, but very important tip. When your chicken is done cooking, take it off the grill, put it on a serving dish and let it set for at least ten minutes before cutting it up. Cooling draws the juices back to the center of the chicken.

If you fail to let it sit, the meat in the center will be dry and hard. To be able to treat your family and friends to some great juicy chicken, you will need to know the best way to grill chicken.

Go back to BBQ Tips Main Page
Go to iGrillBBQ.com Home Page from How to Grill Chicken on a Gas Grill

Categories
Grilling Tips

How to Grill Asparagus on the Grill

Learning how to grill asparagus? What is the secret to grilling asparagus on the grill? Here are some great tips for grilling asparagus.

If you employ a little patience and do it right, grilling asparagus spears can be a great nutritious summer time treat.

How to Grill Asparagus on the Grill: Getting Things Ready

When getting things together for grilling asparagus, the first thing you need is some fresh asparagus. You will need some butter or olive oil. Of course you will need a grill. As far as spices, many people like asparagus with salt and black pepper. Asparagus takes on spices very well and you are free to add whatever you prefer. Some spices that are found to go expectionally well with asparagus are cumin, garlic, thyme and oregano.

How to Grill Asparagus on the Grill: Picking Out and Storing Your Fresh Asparagus

When picking out asparagus for grilling, freshness is the key. When asparagus begins to lose freshness it quickly loses flavor. You know asparagus is fresh when the stalks are firm and straight. Also the tips should be totally closed. When picking out asparagus for grilling, you should prefer the ones with fatter stalks.

They are easier to handle on the grill and will not fall through the grate as easily. Refrigerate  asparagus in a plastic bag with a wet paper towel wrapped around the lower part of the stalk. Asparagus will stay fresh in your refrigerator for three to four days.

How to Grill Asparagus on the Grill: Grilling Your Fresh Asparagus

One  plate or shallow dish, pour in melt some butter or some olive oil. Add spices spices to the butter or oil and roll the asparagus spears in the mixture. If you have time leave them in the mixture for about 20 minutes while covered with a paper towel so they can soak up the mixture. Individually place the asparagus spears on the grill.

Be sure to place them in way so they will not slip through the grate. The spears should not be over a direct flame or high heat. After the about four minutes on each side, the asparagus should become pliable. When the stalks start to become soft, they are done. Set the asparagus aside for a while to cool and reabsorb the juices.
Hope you enjoyed learning how to grill asparagus!

Go back to BBQ Tips Main Page
Go to iGrillBBQ.com Home Page from Asparagus on the Grill