Categories
Bar-B-Q Recipes Grill Fruit

Grilled Bananas

Move over ice cream! Grilled bananas are taking the dessert table by storm, and once you’ve tasted the custardy goodness of a banana fresh off the grill, there’s no going back. But don’t take my word for it. Try one of these delicious recipe options and watch your family and friends…well, go bananas.

Grilled Bananas with Topping

A simple grilled banana can be dressed up any number of ways by adding your favorite sundae toppings. Start with a medium-hot grill. Place unpeeled bananas directly onto the grill, and cook for 4-5 minutes per side. The banana skin will darken and bananas will feel soft. Remove from grill, peel, and scoop fruit out into a dish. Top with caramel drizzle, chopped nuts, dried fruit, or chocolate bits.

More Recipe Ideas for Grilled Bananasgrilled bananas

Once you have the basic grilling technique down, you can try lots of different ideas for spicing up the basic grilled banana:

  • Banana Boats–Slit banana skin open before grilling. Stuff chocolate pieces and miniature marshmallows inside skin. Grill for 10-12 minutes.
  • Cinnamon-Sugar Bananas–Slice bananas into quarters and peel. Sprinkle with lemon juice, then roll in cinnamon and brown sugar mixture. Place in foil packet and grill for 5-6 minutes. Serve with vanilla ice cream.
  • Chilled Chocolate Peanut Butter Bananas–Grill bananas as described above. Prepare chocolate peanut butter ganache: Mix 1/2 cup heavy cream and 1/2 tsp vanilla. Simmer on stovetop for about 3 minutes. Remove from heat. Immediately stir in 5 oz. of chopped dark chocolate pieces and 1/4 cup creamy peanut butter. Stir until smooth. Drizzle ganache over grilled bananas and place in refrigerator until ganache firms.

Health Benefits of Grilled Bananas

Bananas have been linked to numerous health benefits, including increased seratonin levels (the brain chemical responsible for positive moods), lower blood pressure, reduced muscle cramping, better digestive health, and even antacid benefits for people with heartburn. But not everyone enjoys the taste of a banana straight out of the skin. Grilling bananas changes their texture and offers a bit of a twist on the natural banana flavor. And while it’s possible to smother your banana in lots of non-healthy toppings (hey, who doesn’t love a great dessert!), you still get all of the great health benefits bananas bring to the table.

Looking for a healthier grilled banana? Serve with an ounce or two of dark chocolate for heart-healthy antioxidants or drizzle with honey and sprinkle with cinnamon for a less sugary dessert option. You can also add bananas to a fruit kebab for a delicious side dish.

Go back to BBQ Recipes from Grilled Bananas
Go back to iGrillBBQ Home from Grilled Bananas Page

Categories
Bar-B-Q Recipes Grill Fruit

Grilled Apricots

Apricots function well either as a side dish with pork or beef, as part of a salad, or as a stand-alone dessert. Grilling them imparts an added layer of flavor as the fruit caramelizes. If you’ve never tried apricots on the grill, you’re in for a delectable treat.

Getting Started with Grilled Apricots

It doesn’t take long on the grill for an apricot to develop that delicious grilled flavor and texture. Choosing slightly less ripe fruit will help them hold up better and not turn mushy during grilling. Cut the apricots in half and remove the pit. Brush with oil and then place the fruit on the grill cut side down for about 3-5 minutes, or until you see grill marks.

grilled apricotsGrilled Apricot Recipes

Wondering how to serve those luscious grilled apricots you just took off the grill? Try some of these taste bud tantalizing recipes:

  • Grilled apricots with yogurt and toasted pecans–Fill the divot in each apricot with a dollop of vanilla yogurt and top with toasted pecans and cinnamon. Add a drizzle of honey if you want a sweeter option. Serve chilled for dessert or a delicious breakfast addition.
  • Apricot and feta cheese salad–Chop grilled apricots and toss with spinach or arugula, walnuts, and feta cheese.
  • Apricot hors d’oeurves–Transfer grilled apricot halves to a platter and fill with goat cheese. Sprinkle with black pepper and garnish with a sprig of rosemary or parsley.
  • Pork Loin with Apricots–Grill pork loin according to recipe. Serve with grilled apricots and scallions. Drizzle with maple honey glaze to complete the dish. 
  • Chocolate Apricot Dessert–Drizzle grilled apricots with melted chocolate and sprinkle with sliced, toasted almonds for a delectable dessert.

Of course, there are many other ways to prepare grilled apricots. Their diversity offers a wide array of recipe options encompassing side dishes, main courses, salads, breakfasts, and desserts.

 Perfecting Your Grilled Apricots

If your apricots seem over- or under done, use these indicators for perfectly grilled fruit. You should be able to remove the fruit from the grill easily, with no sticking. Watch for the skin to begin separating from the fruit. The fruit should be soft to the touch, but not mushy.

Leaving apricots on the grill too long will result in a charred, mushy mess. Some chefs prefer to cook over indirect heat in order to lessen the possibility of overcooking. Either direct or indirect heat will produce good results, however, as long as you keep a close eye on the fruit during the cooking process.

Go back to BBQ Recipes from Grilled Apricots
Go back to iGrillBBQ Home Page from Grilled Apricots

Categories
Bar-B-Q Recipes Grill Fruit

Grilled Apples

Potatoes and vegetables are generally the go-to sides for most meats, but one often-overlooked option is the grilled apple. Grilled apples pair well with pork, fish, and poultry, bringing a sweet flavor to an otherwise savory meal. Who says the sweets have to wait for dessert?

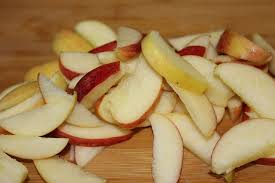
Grilled Apple Basicsgrilled apples

The secret to a great grilled apple is to choose a variety that has both good flavor and firm texture so that it will hold up well on the grill. Favorites include Honeycrisp, Granny Smith, and Pink Lady. These varieties have a strong, tart flavor to balance out any sweet glaze you might want to add, as well as a crisp texture that won’t turn mealy during the cooking process.

Ready to try some apples on the grill? Follow this basic recipe:

  • Remove core from apples. If you use an apple corer rather than slicing the apple into pieces, you’ll have nice pretty rings for a delicious display. Remove apple skins if desired.
  • Slice  apples into 1/2 inch thick pieces or rings. Thicker slices will require longer cooking time.
  • Brush both sides of apple with oil or butter to prevent sticking.
  • Place on grill for about 2-3 minutes per side, or until grill marks appear.
  • Drizzle with glaze if desired; cook for an additional minute per side. Alternatively, you can drizzle with honey and sprinkle with desired seasonings.

Grilled Apple Recipes

There are several ways you can dress up a basic grilled apple. Try one of these options for a delicious side dish your guests can’t stop talking about:

  • After grilling, drizzle with honey and sprinkle with cinnamon.
  • Make a glaze with maple syrup, brown sugar, apple cider, and cinnamon. Brush glaze onto apples during the last few minutes of grilling.
  • Slice apples into wedges and place in aluminum foil packet. Drizzle with caramel and grill for 8-9 minutes, or until you can easily pierce with a fork.
  • Create a guilt-free side dish by marinating apples instead of using calorie-laden toppings. Combine orange juice, honey, and fresh herbs (try mint for a refreshing complement to the apple flavor); place apples in marinade for a couple of hours before grilling.

Secrets to Perfect Grilled Fruit

Fruit on the grill is a new concept for a lot of backyard chefs, but keep these pointers in mind and you’ll have perfect fruit dishes every time. Keep a close eye on the fruit while it’s cooking. It only takes a couple of minutes. Brush fruit with oil, or you’ll be scraping it off the grill with a spatula. Try grilling fruit over indirect heat until you perfect your technique. It will be less likely to char that way.

Most importantly, don’t be afraid to try something new! Grilled fruit may become a new family favorite!

Go back to BBQ Recipes from Grilled Apples
Go back to iGrillBBQ Home Page from Grilled Apples

Categories
Bar-B-Q Recipes Grill Fruit

Fruit Kebab

Looking for something new to change up your grilling repertoire? How about trying something you may not have considered before: fruit kebabs! Grilled fruit offers new and exciting taste possibilities, so get ready to expand your knowledge and impress your friends.

How to Grill a Fruit Kebabfruit kebab

Grilling a piece of fruit caramelizes it, allowing the sweet juices to bubble to the surface and enhancing the flavor. You can also bring out the flavor of fruit with a basting sauce or seasoning. Follow these steps for perfectly grilled fruit kebabs, every time:

  • Choose which fruits you want to include on your kebab. Fruit with high water content (like citrus) and very delicate fruits (like raspberries and blackberries) usually don’t grill well. Try to include a variety of textures and flavors for variety.
  • Remove skin and seeds. Chop into chunks no thicker than half an inch. This will allow the fruit to cook evenly.
  • Soak fruit pieces in water for about 15 minutes before grilling. The excess water helps keep the fruit from burning while on the grill.
  • Skewer each piece of fruit, alternating varieties like you would for a vegetable or meat kabob.
  • Brush with vegetable oil or a basting sauce to prevent sticking.
  • Grill the fruit kebab over medium to high heat for 3-5 minutes, turning often. Firm fruits like apples or pears may need longer cooking time, while soft fruits such as strawberries will just need a couple of minutes.

Fruit Kebab Basting Recipes

Basting your fruit kebab with a sweet sauce can add a little extra pizazz to an already unique taste experience. Try some of these glazes and sauces for a truly delicious dessert:

  • Maple, cinnamon, and ground cumin. Mix well and coat fruit pieces before skewering.
  • Brown sugar, pineapple juice, cinnamon, ginger, and vanilla–Stir until sugar dissolves; then brush onto fruit skewers before grilling.
  • Chocolate sauce–Use a store-bought sauce or make your own!
  • Caramel sauce–Bring brown sugar, cream, butter, and vanilla extract to a boil. Simmer for 5-7 minutes while whisking gently; then drizzle over fruit. After grilling, top fruit kebabs with shredded coconut

Other Flavor Ideas

In addition to glazes or sauces, you can also try including a marshmallow or two on your fruit skewer. As it melts, it will drip down over the fruit. Alternatively, try sprinkling cinnamon and nutmeg over the fruit before grilling.

Next time you need a dessert that will wow the crowd, consider adding fruit kebabs to your summer grilling menu. Grilling fruit may sound unusual, but it will result in a dessert every bit as delicious as your favorite fruit pie–only with much less work!


Go back to BBQ Recipes from Fruit Kebab
Go back to iGrillBBQ Home Page from Fruit Kebab

Categories
Uncategorized

Zucchini

Zucchini makes a perfect complement to any summer meal, either as a stand-alone side dish or as part of a mixed vegetable dish. This delicious, nutritious summer squash is super easy to grill. Mix it with yellow squash and carrots or serve it solo alongside chicken, fish, or pork.Grilled_zucchini

Choosing Fresh Zucchini

The best zucchini comes straight out of your garden. Just wash, slice, and grill. If you don’t have a garden, your next best option is a local farmer’s market. Vegetables always have better flavor when they haven’t been sitting around in cold storage. Even if you’re buying from the grocery store, though, you can still get delicious grilled zucchini if you know how to pick the right ones. Don’t choose the biggest zucchini in the bin; smaller zucchini will be more tender and flavorful. Feel for soft spots and avoid zucchini that look wrinkled around the stem, as this means they’ve been sitting around a while.

Delicious Zucchini on the Grill

Ready to start grilling? Wash the zucchini and pat dry; then slice either in quarters lengthwise or in round slices. Coat the zucchini slices in oil and add salt, garlic, and a little lemon zest. If you want the zucchini to really soak up some flavor, you can let it marinate for about 20 minutes. Once the seasonings have been added, place the zucchini slices on the grill over medium-low heat. Cook until zucchini can be easily pierced with a fork. Be sure to turn the slices so you get those nice grill marks on each side. Sprinkle with some additional sea salt and lemon zest or parmesan cheese before serving.

More Recipe Ideas

If you have a lot of zucchini from the garden or you just want some additional seasoning options, try some of these ideas to give your zucchini a different flavor:

  • Italian–Marinate zucchini in Italian dressing and sprinkle with mozzarella.
  • Herb vinaigrette–Brush with a mixture of your favorite vinaigrette, some garlic, and a pinch of basil, oregano, and rosemary.
  • Lemon Butter–Make a lemon butter sauce of melted butter, lemon zest or lemon-butter seasoning, garlic, and oregano. Brush onto zucchini before grilling.
  • Mixed Grill–Mix zucchini with yellow squash, broccoli, carrots, onions, mushrooms, and peppers for a satisfying side dish. Place vegetables in an aluminum foil pouch, and then toss with oil-based salad dressing or olive oil and your choice of seasonings. Seal pouch and place on grill over medium heat for about 15 minutes or until vegetables are tender.

Go back to BBQ Recipes from Zucchini
Go back to iGrillBBQ Home Page from Zucchini

Categories
Bar-B-Q Recipes Grill Vegetables

Green Beans

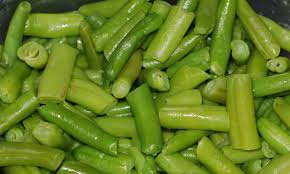
Everything tastes better on the grill, and green beans are no exception. Forget the mushy, flat texture that happens when you let beans boil or sautee too long. Try grilling your beans for dinner tonight and savor that crisp-tender, slightly charred flavor you can’t get any other way.green beans2

The Secret to Great Grilled Green Beans

In order to produce the perfect grilled beans, you’re going to need an extra piece of equipment–the grill pan or grill basket. A grill basket keeps small vegetables like green beans contained so you don’t lose them in the grill (or over the edge). You don’t need anything fancy–just a simple, inexpensive basket will do the trick. Be sure to spray the basket with oil so your beans don’t stick and keep a spray bottle full of water handy to tamp down grill flare-ups if the oil drips.

Grilled Green Beans Recipe

With your grill basket in hand, your ready to toss those beans on the grill. Here’s what to do: Preheat grill to medium-high heat. Place grill basket over grill so that it preheats as well. Trim the ends off the green beans and rinse under cold water. Toss beans with one tablespoon of olive oil, plus any seasonings you’d like to add. Try minced garlic, sea salt, and parmesan cheese for an easy, tasty result. You can also add lemon juice if you like a bit of a citrus flavor. Transfer beans into grill basket and close grill lid. Keep a close eye on them so they don’t get overdone. You want a small bit of browning or charring, but don’t let them turn black and crispy! Beans will be finished in about 10-15 minutes.

Another Way to Grill Green Beans

If you don’t have a grill basket and you impulsively decide to grill beans for dinner, what’s your next option? Try steaming them in a foil pouch. Prepare beans as described above. Make an aluminum foil pouch by folding a sheet of foil in half and crimping the edges. Place beans in pouch and toss onto the grill for about 15 minutes. Voila! Perfectly steamed green beans!

Green beans make a perfect complement to just about any meat. Fish, chicken, beef, and pork all pair well with seasoned, grilled green beans. You’ll be pleasantly surprised by how much better the beans taste when you cook them on the grill. If you grill them alongside your meat, they’ll not only pick up that deliciously smoky flavor from the grill itself, but also the flavor of whatever meat you’re having for dinner.

Go back to BBQ Recipes from Green Beans
Go back to iGrillBBQ Home Page from Green Beans

Categories
Bar-B-Q Recipes Grill Vegetables

Eggplant

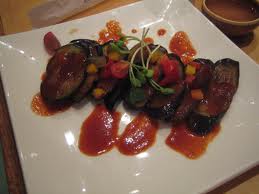
Eggplant is often an underappreciated vegetable. Most people think of it as a vegetarian alternative to meat in dishes like lasagna and babaganoush. And while the funky-looking purple vegetable performs adequately in these dishes, the grill gives eggplant the opportunity to really shine.eggplant

Choosing the Perfect Eggplant

Eggplant isn’t a vegetable most people eat every day, so here are a few tips on choosing one that’s fresh and tasty. First, look for an eggplant that is smooth and shiny and feels a bit heavy. The best eggplants will be in stores in late summer, so if you’re shopping out of season, be extra careful that you’re getting a fresh one. If eggplants are stored too long, they can become bitter. Second, press on the skin gently to make sure the eggplant isn’t mushy. It should give a little, but bounce right back (sort of like a cucumber).

Why Eggplant Deserves a Place on Your Grill

If you’ve never eaten eggplant before, you may be wondering why should give it a try. Eggplants are powerhouse vegetables, offering a wide variety of nutrients and antioxidents, thanks to the dark purple skin. They are a great source of fiber, Vitamin B1, Vitamin B6, Vitamin B3, Vitamin K, potassium, and folate. In addition to their nutritional benefits, eggplants also make a hearty, filling addition to the menu. They can hold their own as a stand-alone side dish or make the perfect complement to a mixed grill.

How to Grill Perfect Eggplant

Slice the eggplant in half length-wise or into round slices. Salt generously and allow to sit for 30 minutes to an hour. The salt will draw out the bitter juices and keep the eggplant from soaking up too much oil. When you’re ready to grill, rinse the salt off the eggplant, brush with oil and season to taste. Grill over medium-high heat for 3-4 minutes per side or until grill marks turn dark  and flesh is tender. The thicker your slices, the longer grilling time you’ll need. Below are some seasoning ideas to help the flavor of your eggplant really pop:

  • Garlic-Herb–Brush with olive oil and sprinkle with minced garlic, salt, and parsley.
  • Greek–Olive oil, minced onion, and minced olives. Garnish with feta cheese after grilling.
  • Italian–Olive oil, minced garlic, and oregano. Layer with mozzarella and sliced or grilled tomatoes
  • Parmesan-crusted–Brush with olive oil and sprinkle with garlic and salt. Grill until tender and then sprinkle with breadcrumbs and parmesan cheese.

Go back to BBQ Recipes Main Page
Go to iGrillBBQ.com Home Page from Eggplant

Categories
Bar-B-Q Recipes Grill Vegetables

Broccoli

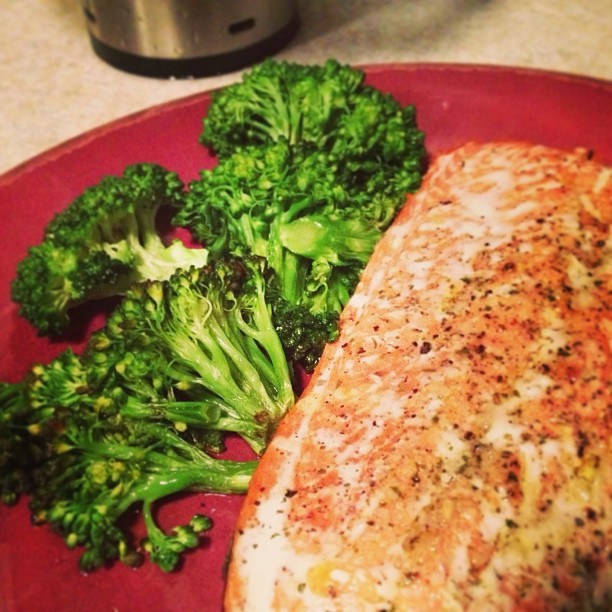
Vegetables on the grill take a little more finesse than your average hamburger or hot dog, but they are well worth the effort. Broccoli is one vegetable that isn’t often considered for the grill, but with just a little know-how, grilled broccoli may just become a family favorite. broccoli

Broccoli on the Grill

The best way to cook broccoli on the grill is to steam or roast it. If roasting, brush with oil first to prevent sticking. You can also marinate the broccoli for 10 to 20 minutes before cooking to add flavor. Roasted broccoli will also pick up that unique grill flavor, so don’t go too heavy on the spices. Try a simple marinade made with garlic and lemon for just enough flavor.

Roasting Broccoli on the Grill

If you’ve never made broccoli on the grill before, don’t worry. It’s really very simple. Here’s an easy recipe to get you started, but remember that you can tweak your seasonings and cooking time to taste:

  • Cut broccoli into florets or spears
  • Place in boiling water to blanch for 3 minutes. This will soften up the broccoli and help it cook faster.
  • Brush with olive oil and sprinkle with garlic, salt, and parmesan cheese.
  • Heat the grill to high heat.
  • Place broccoli on a layer of aluminum foil. You can turn the edges up to create a tray that keeps the broccoli from spilling onto the grill and makes it easier to remove.
  • Cook for 10-15 minutes or until broccoli reaches desired tenderness

You can also cook the broccoli over indirect heat by using the burners on only one side of the grill. This method may take a little longer for the broccoli to finish cooking, but it will be less likely to char.

Steaming Broccoli on the Grill

If you don’t like the idea of your broccoli taking on the charred flavor that accompanies roasting, you can try steaming it instead. You can easily steam a side dish of broccoli while grilling chicken or steak. Simply make a pouch by folding a large piece of aluminum foil in half and crimping the edges. Place broccoli pieces inside along with a small amount of water. You can also add a little butter for flavor. Seal the pouch and place on the grill over medium heat for 7-8 minutes. Be careful when you open the pouch, as the steam inside can cause burns.

If you don’t consider yourself a broccoli person, it may be because you’ve never had it cooked in a way that appeals to your taste buds. Cooking broccoli on the grill gives it a unique flavor that may just make a broccoli lover out of you.

Go back to BBQ Recipes Main Page
Go to iGrillBBQ.com Home Page from Broccoli

Categories
Bar-B-Q Recipes Grill Vegetables

How to Grill Artichokes

Artichokes are usually served steamed, but these nutritional powerhouse vegetables are more versatile than they may seem. If you’re looking for a new twist on artichoke preparation, grilling produces a satisfying smoked flavor, especially when paired with a lemon garnish.

How to Grill Artichokes: Choosing the Best Artichoke Globes

The best choices for grilling are the first baby artichokes of the season, picked while still small and tender. Globes should feel heavy, with no visible bruising or marks. Leaves should be dark green and tightly closed. Even if there are no baby artichokes to be found, select the smaller globes as they will be more tender and flavorful than larger ones.

How to Grill Artichokes: Preparation for Grillinggrilled artichokes

Artichokes require quite a bit of preparation before they’re ready to hit the grill. Have a lemon on hand to squeeze lemon juice over exposed inside areas of the artichoke as you work. This will keep them from turning brown.

  1. Peel any extra leaves from the stem. Snip the spiny tips off all remaining leaves.
  2. Trim about 1 inch off the tip of the artichoke. Trim the tough, fibrous end off the stem as well. Remove the outer layer from the remaining stem with a vegetable peeler.
  3. Slice the artichokes into halves, exposing the center.
  4. Use a spoon to remove the furry choke in the center of the globe, dropping each half into lemon water when it is finished. You can slice into quarters for faster cooking time if you prefer.
  5. Boil or steam the artichokes until you can pierce the stem with a knife. The majority of the cooking is done at this time, so make sure the artichokes have reached the desired tenderness before transferring to the grill.

How to Grill Artichokes: Ready for the Grill

With artichokes steamed or boiled to make them tender, you can now place them on the grill to add a delicious smoked flavor.

  1. Preheat grill to medium heat.
  2. Brush artichokes with oil and sprinkle with salt and pepper.
  3. Place artichokes onto the grill center side down.
  4. Grill for 8-10 minutes over medium heat, or until slightly charred.

Your artichokes should be tender, with nice grill marks. To serve, squeeze lemon juice over the artichokes and offer hollandaise, vinaigrette, or lemon herb sauces for dipping. You can enjoy them either warm or chilled. If you plan to serve them chilled, you can grill the artichokes up to 24 hours in advance and store them in the refrigerator.

Go back to BBQ Recipes from How to Grill Artichokes
Go to iGrillBBQ.com Home Page from How to Grill Artichokes
Categories
Bar-B-Q Recipes Grill Chickens Grill Sauces

Grilled Chicken Marinade

Want juicy flavorful chicken on the grill? The secret is a well-crafted marinade. Marinating before cooking breaks down the connective tissue and muscle fibers, making the meat more tender. It also infuses flavor into the chicken and helps retain moisture for a juicier, more flavorful result. It’s important that meat be in direct contact with the marinade for the best result, so make sure each piece of chicken is completely covered. Alternately, you can turn the meat halfway through to make sure all sides come into contact with the liquid.

Grilled Chicken Marinade: Basics of a Perfect Marinade

The tenderizing effect of marinade is a result of the acid in one or more of the ingredients. Fruit juice and vinegar are two common ways to achieve the desired acidity. Many recipes also include oil. Next, you can add any variety of seasonings to create a delicious and distinctive flavor. Place chicken in a zip top bag, squeeze out the air, and seal shut. Chicken should be marinated in the refrigerator 1-2 hours in order to soak up the flavor. You can leave it in the marinade longer, but not more than 24 hours. Marinating for too long will cause meat to turn mushy as a result of the acidic enzymes breaking down the tissue.

Grilled Chicken Marinade: Balsamic Chicken Marinade

This recipe uses lemon juice and red wine vinegar for the tenderizing effect and creates a savory garlic flavor. You can brush any leftover marinade directly onto the chicken just as it goes onto the grill for additional flavor.

  • 1 1/2 c. olive oil
  • 1 c. lemon juice
  • 1/2 c. red wine vinegar
  • 2 Tbs. oregano
  • 2 Tbs. garlic powder
  • 1 tsp. salt
  • 1 tsp. black pepper

Place chicken on the grill over high heat. Chicken breasts should be grilled for 10-12 minutes. Legs and thighs should cook for about 20 to 25 minutes.

Grilled Chicken Marinade: Teriyaki Chicken Marinade

chicken marinade

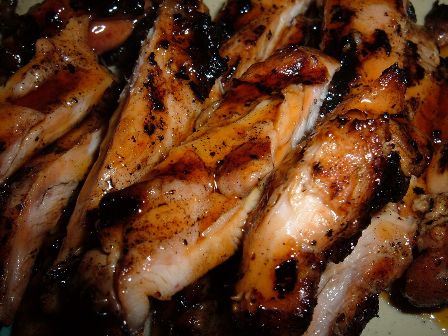
This teriyaki marinade provides a tangy, Asian flavor to your chicken. Brush the chicken with teriyaki sauce or leftover marinade before placing it on the grill to add an extra layer of flavor. Sprinkle with toasted sesame seeds before serving.

  • 1/3 c. soy sauce
  • 1/3 c. balsamic vinegar
  • 1/4 c. firmly packed brown sugar
  • 2 cloves garlic, pressed or minced
  • 1 tsp. ginger root, grated
  • 1/4 tsp. black pepper
  • 2 thinly sliced green onions

Combine all ingredients except the green onions in a medium saucepan. Cook on low heat until sugar is dissolved, stirring constantly. Remove from heat. When marinade has cooled, stir in green onions.

Next time you have a taste for chicken on the grill, try one of these delicious marinades or whip up one of your own and see where your creativity can take you! There’s no end to the flavor combinations and variety you can create by following these basics for a delicious grilled chicken marinade.

Go back to BBQ Recipes from Grilled Chicken Marinade
Go to iGrillBBQ.com Home Page from Grilled Chicken Marinade